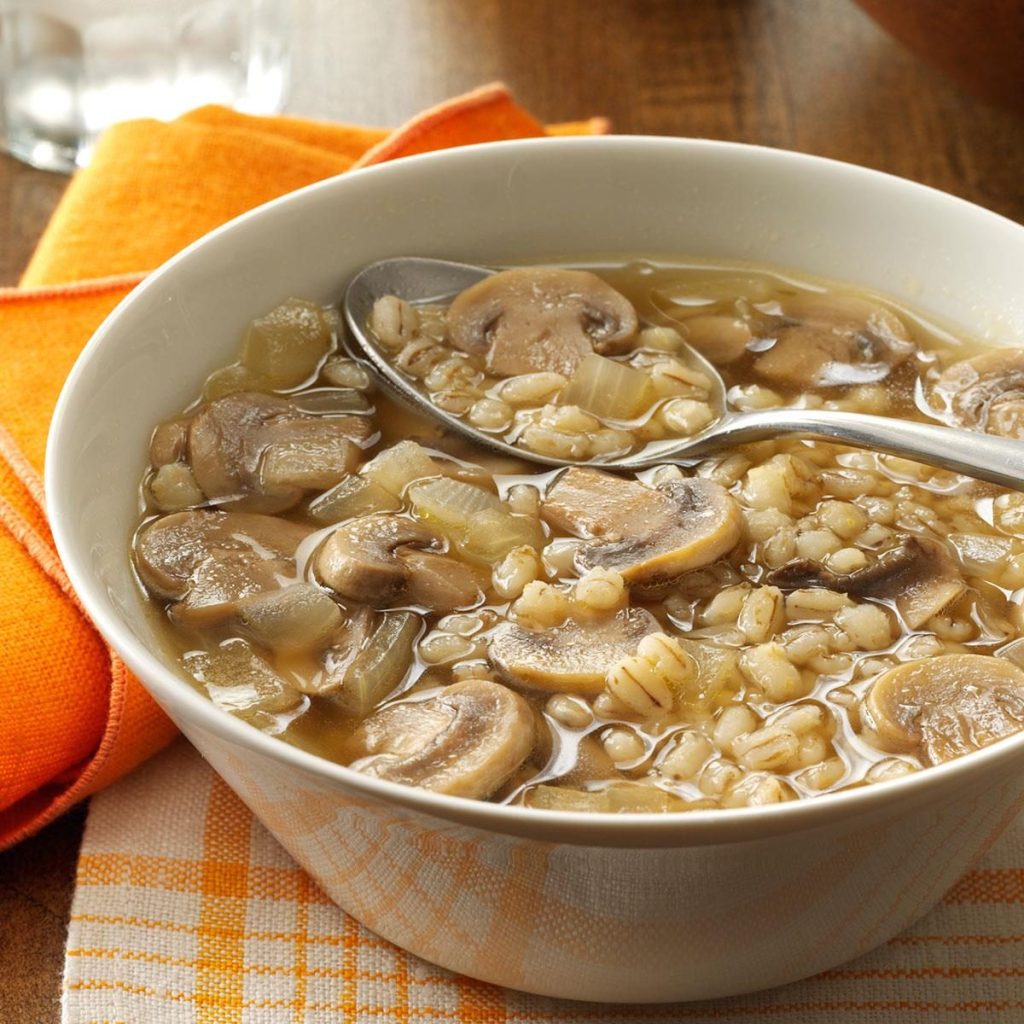
1 pound mixed mushrooms, sliced ( I used cremini and shiitake)
1/2 cup pearl barley
1 cup finely minced celery
4 Tablespoons butter or olive oil (or 2 Tablespoons olive oil and 2 Tablespoons butter)
2 cups beef broth (preferably home made)
splash of white wine
salt, pepper to taste
Directions:
Bring a pot of water to a boil and add a teaspoon of salt. When the water boils, add the barley and boil gently, uncovered, until the barley is soft. Drain and save the cooking water.
Melt the butter/oil in a large soup pot, sauté the onions, celery and garlic for a few minutes. Add the mushrooms and sauté for another 10 minutes, stirring often until the mushrooms lose their moisture and brown a bit. Add a splash of white wine, and let it bubble to evaporate for a minute or two.
Add the beef broth, barley and enough of the cooking water to cover the vegetables and then some. Let simmer, partially covered, for several minutes to let flavors mingle. Add salt and pepper to taste.
I recently ate in a seafood restaurant and had a wonderful puréed asparagus soup. The waiter insisted that it was purely vegan, so I decided to try and duplicate the recipe at home. It was delicious! I was so inspired that the next time I substituted cauliflower for the asparagus, and another time, broccoli.
Here are the results of my experiments.
Wash and slice 2 leeks (white and light green parts) and 2 large Yukon gold potatoes, and sauté them in a generous amount of olive oil. Then add either 1 bunch of washed, cut asparagus, or a head of washed and cut up cauliflower, or 1 bunch of washed and cut up broccoli. Put a cover on the pot to steam all of the vegetables together. Then add water to cover, with a splash of white wine. Bring the soup to a boil, and then a simmer until all the vegetables are soft. Purée the soup with an immersion blender and add salt (and pepper) to taste. Instead of wine, or even with the wine, add fresh lemon juice at the end, again to taste. To serve, add:
chopped fresh parsley leaves
swirl of olive oil
The soup can be made using half water and half chicken stock instead of water and wine, but additional lemon juice still might be necessary.
I have been looking for a sour-cream coffee cake recipe for awhile. This is a good one. It’s quite rich, so your serving sizes don’t need to be large. (The streusel topping calls for 1/2 cup sugar. I reduced it to 1/4 cup sugar. It was sweet enough.)
INGREDIENTS
Yield: About 12 servings
½ cup/113 grams unsalted butter at room temperature
1¼ cups/260 grams sugar
2 large eggs
1½ cups flour/188 grams
1½ teaspoons baking powder
½ teaspoon baking soda
½ teaspoon salt
1¼ cups/300 grams sour cream
1 teaspoon vanilla
For the Topping
½ cup/104 grams sugar
2 teaspoons all-purpose flour
1 tablespoon cinnamon
⅓ cup/70 grams chopped pecans or walnuts
PREPARATION
Step 1: Preheat oven to 350 degrees and generously butter a 9-by-13-inch baking pan. Cream butter and sugar together until light and fluffy. Add eggs one at a time, beating well after each addition. (I used a square 8″ by 8″ glass baking dish.)
Step 2: In a separate bowl, sift flour with baking powder, baking soda and salt. With the mixer on low speed, add the flour mixture to the butter mixture alternately with sour cream and vanilla until just combined. Do not over mix. Pour batter into prepared baking pan.
Step 3: Make the topping: Combine sugar, cinnamon, flour and nuts in a small bowl and mix well.
Step 4: Sprinkle the topping evenly over the cake and bake 30 to 35 minutes, or until a cake tester comes out clean. Cool, cut into pieces and serve.
My daughters found this recipe on Instagram and made it for me. Just delicious!
INGREDIENTS
1 head cauliflower, cut into florets
1 medium onion, sliced
4 sprigs thyme
4 -8 garlic cloves, unpeeled (however many you use, try to use fat ones, to ensure, soft spreadable roasted garlic butter in the end)
3 to 4 tablespoons olive oil or grapeseed oil (I use 4)
Kosher salt and freshly ground black pepper
½ cup grated Parmigiano Reggiano
INSTRUCTIONS
Preheat oven to 425°F. Toss cauliflower florets on a large rimmed baking sheet with onion, thyme, garlic, and oil; season with salt and pepper. Roast, tossing occasionally, until almost tender, 35-40 minutes—check after 30 minutes.
Sprinkle with Parmesan, toss to combine, and roast until cauliflower is tender and golden, about 10 minutes.
Note: 30 minutes seems to be right, but every oven is different, so start checking at the 30 minute mark.
I have made this roast several times for holiday dinners, and it is just wonderful. However, if you want to have a gravy to enhance your sides, then check out his website below for his basic brown sauce recipe. My family prefers their meat more well done, so I cook the roast longer than suggested but keep a close eye on it.
From Jacques Pepin, “Although my wife is normally not an aficionado of roast beef, she loves this recipe. The spicy rub — garlic, ginger, sugar, soy sauce, cayenne, dry mustard, and paprika — is the reason why.
The roast should be from the smaller, less fatty end of the rib section. Cleaned of the layer of fat on top, the meat is roasted in a hot oven, then allowed to rest for at least 20 minutes and up to 1 hour in a warm oven before serving so it is totally pink throughout.”
Serves 6 to 8
RUB 3 large garlic cloves 1 piece ginger (about the same size as the combined garlic cloves), peeled 2 teaspoons sugar 2 tablespoons soy sauce 1/2 teaspoon cayenne pepper 1 teaspoon dry mustard 1 teaspoon paprika
1 3-rib beef rib roast (about 7 pounds), all visible fat trimmed from top (about 6 pounds trimmed)
FOR THE RUB: Blend all the ingredients in a blender until smooth. Rub the mixture over the top and sides of the roast.
Place the roast meat side up in a small roasting pan and roast for 30 minutes. Turn the meat bone side up and roast for another 30 minutes. Remove the roast from the oven, and leave the oven door open to cool the oven to about 140 degrees.
Transfer the roast to a platter.
If you want the sauce:
Skim off and discard all the fat that accumulated in the roasting pan. Add the water, wine, and brown sauce to the drippings in the pan and stir to melt the solidified juices.
Return the roast, bone side up, to the roasting pan with the juices and let rest in the warm oven for 20 to 30 minutes before carving.
To serve, carve the roast into thin slices. Arrange on the watercress, if using, on individual plates or a platter, and serve with the juices.
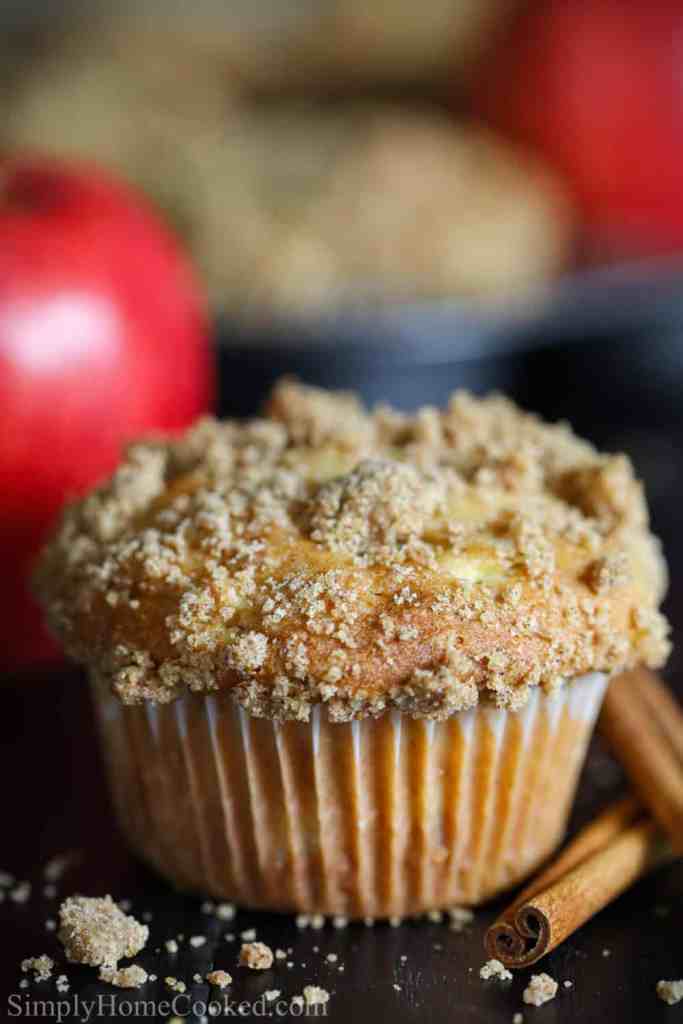
This is a recipe from my grandson, Kai. It was found in a children’s cookbook authored by Chef Emeril Lagasse. I changed a few things – didn’t toast the walnuts, used a whole, fresh apple instead of dried, and Half and Half instead of milk. That’s what I had in the refrigerator; the results were amazing.
Make the streusel topping by combining the walnuts, brown sugar, 1/4 cup flour, and 1/2 teaspoon cinnamon in a small mixing bowl. Stir with a fork to combine.
Add the 2 tablespoons butter and stir well. Set aside while you prepare the muffin batter.
Line a 12-muffin tin with 12 paper muffin-tin liners.
Place the remaining 2 cups of flour, baking powder, baking soda, the remaining 1/2 teaspoon of cinnamon, salt, and nutmeg in the medium mixing bowl and stir to combine.
Add the apples and granulated sugar and stir well.
In a large mixing bowl, whisk together the eggs, milk, applesauce, and melted butter.
Add the dry ingredients to the egg mixture and whisk just until incorporated, being careful not to over mix.
Divide the batter evenly among the muffin cups.
Sprinkle the streusel topping over the batter, dividing it evenly among the 12 cups.
Bake the muffins in the oven until golden brown, about 25 minutes.
Remove the muffins from the oven and let cool in the tin for 10 minutes. Serve warm.
If you’re a big raisin fan, add some raisins to the muffin batter.
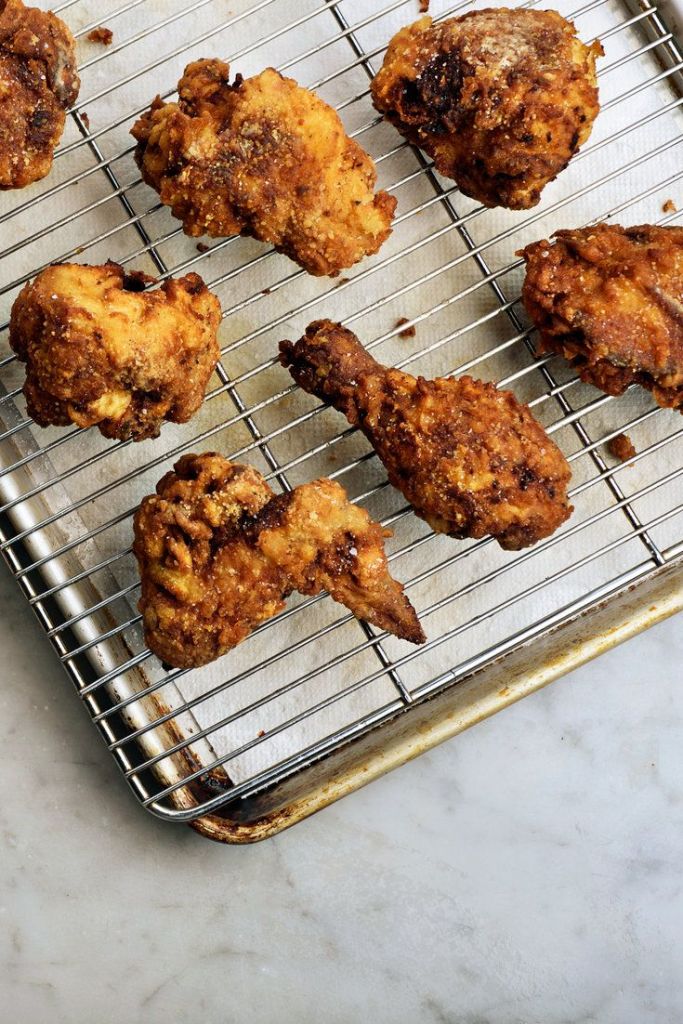
I am a big fan of fried chicken, and this is a terrific “how to.” It is a basic yet delicious recipe for buttermilk fried chicken with a crisp crust. Learn this recipe and perfect your frying technique, and then try adding some paprika or cayenne to the dredge, or a bit of hot sauce to the brine. Sam Sifton suggests drizzling hot honey over it all before serving. (To make one, simply heat a half cup of honey in a small pot set over low heat and shake in red pepper flakes or hot pepper sauce to taste.) I just like my fried chicken plain.
Ingredients and Preparation
Yield: 4 servings
1 chicken, approximately 3 to 3½ pounds, cut into 10 pieces (or use a mix of thighs and drumsticks)
3 to 4 cups buttermilk
3 tablespoons kosher salt, more as needed
2 teaspoons ground black pepper, more as needed
1½ cups all-purpose flour
3 cups peanut oil, or a neutral oil like canola, more as needed
Step 1: The Brine
Place chicken pieces in a bowl and toss them with buttermilk, 2 tablespoons salt and a healthy grind of black pepper. Cover and marinate for at least an hour and up to a day.
(The Brine: To brine a chicken means to submerge it in a solution of salt and water, sometimes flavored with other ingredients, in order to add moisture and flavor to the meat.)
(BUTTERMILK BRINE: For many fried chicken aficionados, the only acceptable brine is made with buttermilk. Add the chicken to it, cover and place in the refrigerator for a few hours and up to overnight.)
Step 2
Combine flour, 1 tablespoon salt and 2 teaspoons pepper in a large bowl or, ideally, a paper bag large enough to accommodate the flour and the pieces of chicken.
Step 3
Pour oil into a large, heavy-bottomed cast-iron skillet with high sides and a lid, to a depth of a few inches. Heat oil over medium-high heat to 350 degrees. (Any heavy, lidded pot will do.)
Step 4
Set a rack on a baking sheet or tray. Place the chicken pieces in the paper bag filled with the flour mixture and shake well to coat, or toss them in the bowl with the flour mixture to achieve a similar result.
Step 5
Shake off excess flour and fry the pieces of chicken skin-side down, in batches so as not to crowd the pan, for about 5 to 15 minutes, covered by the lid. Remove the lid, turn over the chicken pieces, and cook for about 5 to 15 minutes more, uncovered, until they are cooked through and a deep golden brown. Color is as or more important than time: Watch your chicken and get it out when it’s golden brown.
Step 6
Remove chicken to the rack to drain and rest, sprinkle with salt and serve warm or at room temperature.
A few tips: Use tongs to turn the chicken a few times while it cooks. And, crucially, do not crowd the pan. You want plenty of oil surrounding each piece of chicken, but not so much that it spatters everywhere.
What a wonderful cake! It even inspired me to buy a Bundt pan, but a loaf pan will do. I took the suggestion to use butter instead of oil for a “gentler direction,” but either way, the cake is a winner!
Serves 8
Unsalted butter, shortening, or nonstick cooking spray, for the pan
1½ cups (300 grams) sugar, plus more for the pan if using a Bundt pan
3 large eggs, at room temperature
1 cup (250 grams) whole-milk ricotta cheese, at room temperature
½ cup (123 grams) sour cream or plain whole-milk yogurt, at room temperature
¾ cup (97 grams) extra-virgin olive oil
1 Tbsp. vanilla extract
2½ tsp. (10 grams) baking powder
1 tsp. (5 grams) fine sea salt
1 tsp. finely grated orange or lemon zest
1½ cups (192 grams) all-purpose flour
Step 1
Heat the oven to 350ºF. Lightly grease a 9×5″ loaf pan or a 10–12-cup Bundt pan (or spray with nonstick cooking spray). If using a loaf pan, line it with parchment paper, leaving about 2″ of excess on each side to help you lift the cake out of the pan. If using a Bundt, sprinkle the inside of the pan with sugar, including the center cone.
Step 2
In a large bowl, whisk together the eggs, ricotta, and sour cream until combined. Add the oil and vanilla and mix until well blended. Whisk in the sugar, baking powder, salt, and zest until well combined. Using a rubber spatula, fold in the flour until just incorporated.
Step 3
Scrape the batter into the prepared pan and smooth the top with the spatula. Bake until the cake is golden brown and a toothpick inserted into the center comes out clean, 50–65 minutes for the loaf pan, 40–55 minutes for the Bundt, rotating the pan halfway through baking.
Step 4
Transfer to a wire rack and let the cake cool in the pan for at least 1 hour before unmolding and slicing.
Variation
To take this in a gentler direction, substitute melted butter for the oil.
In this recipe inspired by Turkish chicken kebabs, a yogurt and herb marinade makes them supremely tender and helps them brown beautifully on the grill. While some citrus-heavy marinades begin to break down chicken after just a few hours, this marinade uses only the zest, saving the juice for a quick squeeze before serving. The result is incredibly tender chicken you can prep up to a day in advance. Oregano and thyme work well together here, but feel free to play around with herbs and use what you have on hand, or substitute dried herbs in a pinch.
Note: I wiped most of the yogurt off before I placed the chicken in an enameled cast iron baking dish. I made this in a 400F oven for about 35 minutes (or a little longer, if necessary). Definitely will try this with kebabs using chicken breasts as well.
1½ teaspoons minced fresh thyme (or ½ teaspoon dried thyme)
1 tablespoon olive oil, plus more for the grill or pan
1 teaspoon kosher salt (Diamond Crystal), plus more for serving
¼ teaspoon black pepper, plus more for serving
1 lemon
2 pounds boneless skinless chicken thighs
Chopped fresh parsley, for serving (optional)
Preparation
In a large bowl, combine the yogurt, garlic, oregano, thyme, olive oil, salt and pepper. Zest the lemon over the bowl, reserving the rest of the lemon for serving. Whisk until smooth.
Add the chicken thighs, toss to coat, then cover and refrigerate for at least 3 hours, or up to 24. Remove chicken from the refrigerator 30 minutes before cooking.
If using a grill, clean and oil the grates. Set the grill to medium-high or heat a grill pan slicked with olive oil on the stovetop over medium-high. Grill the chicken for 6 to 8 minutes on each side (depending on the thickness of the thighs), covering the grill halfway through if necessary to retain heat, until cooked through.
Transfer the chicken thighs to a platter and squeeze half the lemon over them. Sprinkle with salt, pepper and parsley, and serve with lemon wedges on the side if desired.
I haven’t done a restaurant review in awhile, not for lack of trying. Lunch today at Mission Sandwich Social and a dinner at Telly’s Taverna, in Astoria, has ended the dry spell. Finally!
The Mission sandwiches are amazing and quite substantial . Each sandwich will comfortably feed two people. ( Adam and I struggled to finish each of ours. I gave up!))
The subs are served on fresh baked, San Francisco-Style Dutch Crunch bread and packed with the finest, freshest ingredients. According to the chef, Brian Tsao, “I’m on a mission… to bring big, saucy subs to the heart of Williamsburg Brooklyn… and am “obsessed with unexpected, over-the-top flavor combinations…”
The sandwiches are pricy for one, but not if shared.
Telly’s Taverns in Astoria was another surprise – also pricy – but perhaps best saved for that special occasion. (We celebrated a family birthday.) They specialize in Greek food, and everything is also the finest and freshest. Some of the dishes we enjoyed were grilled octopus, three dip combination served with warm pita bread, a Greek salad, fresh cut fried potatoes, fried cheese, as well as grilled fish and meat. Their extensive menu also includes spinach pie made to order. (Next time!)
The next time! Everything was so delicious, we returned for another dinner deciding to try new dishes on the menu. This time we ordered fried zucchini (thin zucchini slices covered in a paper thin coating), freshly made spinach pie, grilled salmon, swordfish kebab, and for dessert fried dough with honey and cinnamon (a type of donut) and the best Baklava I have ever eaten (more filling, less puff pastry). Again, dinner didn’t disappoint!