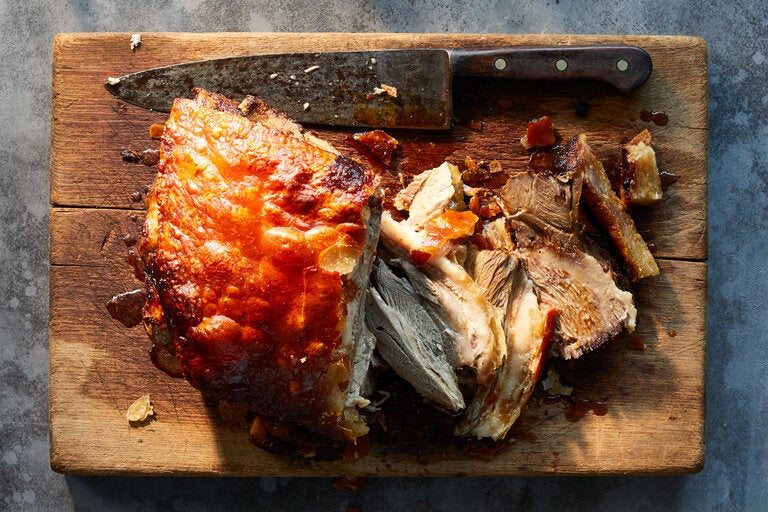
Pernil

Recipe from Maricel Presilla, Adapted by Von Diaz
Watch the YouTube video, How To Make Puerto Rican Pernil | NYT Cooking

We made this over the Christmas holiday with a 4+ pound pork shoulder, and it was delicious. Definitely check out the video. This is not a difficult recipe.

INGREDIENTS

Yield: 8 to 10 servings

For the Adobo (see Notes)

  • 8 to 9 large garlic cloves, finely minced
  • 3 tablespoons olive oil
  • 5 teaspoons fresh sour orange juice (or equal parts lime and orange juice)
  • 4 teaspoons dried oregano
  • 8 to 9 teaspoons kosher salt
  • 1 teaspoon black pepper
  • For the Pork Shoulder
  • 1 (8- to 9-pound) bone-in, skin-on pork shoulder, preferably with skin covering the entire top layer
  • 1 teaspoon kosher salt
  • PREPARATION
  • Step 1: Prepare the adobo by combining all the ingredients and grinding in a large pilón or mortar and pestle, or simply mixing together well in a small bowl.
  • Step 2: Prepare the pork: Rinse and dry meat well with a clean towel. Place pork skin-side down on a large rimmed sheet pan and poke deep, 1-inch holes throughout the meat and in the fatty layer with a paring knife, being careful not to pierce the skin. You can’t have too many holes.
  • Step 3: Pour over adobo in batches, using your fingers to push adobo deep into the meat. If you’re worried about your hands smelling like garlic — which they will! — wear gloves.
  • Step 4: Set out a long sheet of plastic wrap, layering with subsequent sheets as needed to ensure you can securely wrap the entire pork shoulder. Transfer pork to plastic wrap and wrap tightly, adding sheets of plastic as needed to ensure pork is completely airtight and juices are contained. Let marinate in the fridge overnight if possible, or at least least 2 to 3 hours. Set on a rimmed baking sheet or disposable aluminum foil pan in case it leaks.
  • Step 5: Once the pork has marinated, heat oven to 400 degrees. Working over the sink, carefully remove pork from plastic wrap, discarding any remaining adobo. Place the marinated pork shoulder skin-side up in a deep roasting pan, and wipe the skin with a clean cloth. Rub skin with 1 teaspoon salt.
  • Step 6: Loosely tent foil over the pork shoulder, spraying the foil with cooking spray or brushing with oil in any areas that may touch the skin, as it will stick. Transfer to the center of the oven.
  • Step 7: * Roast in the oven for 1 hour, then carefully remove the foil and rotate the pan. Continue roasting for another 2 to 3 hours, rotating every hour or so, and watching closely. Add water to the pan as needed when juices evaporate. The meat is done cooking when the juices run clear and the thickest part of the shoulder registers 160 degrees with a meat thermometer. The skin may take more time to crisp, but watch closely so that it does not burn. Tap the top of the skin with the back of a knife or metal spatula, and listen for a decidedly hollow sound.
  • Step 8: Remove from the oven and let rest for 10 to 15 minutes, then transfer to a large cutting board. (For cleaning instructions for the pan, see Notes.) If desired, remove the skin from the roast by slicing it along the underside of the bone with a long, sharp, slender knife. Run the knife underneath the skin starting from the bottom until loosened, then lift the skin from the meat. Use kitchen shears to cut into serving pieces, and let them rest in the warm oven until ready to eat. Trim excess fat from the meat if desired, and slice as desired, in large chunks or slices, to serve.
  • Tips
  • You can use a smaller or larger pork shoulder, but calculate your adobo accordingly by using the following formula per pound of meat: 1 large garlic clove, 1 teaspoon olive oil, 1 teaspoon kosher salt, ½ teaspoon sour orange juice, ½ teaspoon dried oregano and ⅛ teaspoon black pepper. If using a smaller pork shoulder, you may want to reduce the amount of salt slightly.
  • Use a pan that can handle char. You can line your pan with foil, but that can be even messier. When you’re ready to clean, combine ½ cup baking soda and enough hot water to cover the burned spots, and let rest for half an hour. Char should release easily with your abrasive tool of choice.
  • *My observations: After one hour at 400F, we turned the oven down to 300F and roasted the pernil until it reached 160F on a meat thermometer. We were worried it was cooking too quickly.
  • I will try this the next time:
  • From the website Kitchen Gidget: When ready to cook, preheat oven to 350°F. Leave the roast covered with foil and bake for 4-5 hours, approximately 30-45 minutes per pound. Pork should read 180°F on an internal thermometer and shred easily with a fork.
  • Uncover roast and bake for 15-20 minutes to crisp up the fat, or broil at 500°F for 10 minutes, watching carefully not to burn.

Lemon Ricotta Pancakes

By Genevieve Ko

These are amazing and are delicious just by themselves. No topping is even necessary. (Watch on YouTube: Fluffy Lemon Ricotta Pancakes with Blueberry Syrup | Genevieve Ko | NYT Cooking)

INGREDIENTS

Yield: 8 to 10 small pancakes

  • ¾ cup/102 grams all-purpose flour
  • 1½ teaspoons baking powder
  • ¾ teaspoon fine salt
  • ¼ cup/50 grams granulated sugar
  • 1 lemon
  • 1½ teaspoons pure vanilla extract
  • 3 large eggs
  • ¾ cup/170 grams whole-milk ricotta
  • ¼ cup/61 grams buttermilk, preferably whole milk
  • 2 tablespoons/28 grams unsalted butter, melted, plus room-temperature butter for cooking and serving
  • Blueberry Syrup or other toppings, for serving (optional)
  • PREPARATION
  1. Step 1 Whisk the flour, baking powder and salt in a small bowl. Heat a griddle or large nonstick pan or well-seasoned cast-iron skillet over medium-low.
  2. Step 2 Add the sugar to a large bowl, then finely grate the zest of the lemon directly over the sugar. Using your fingers, gently rub the zest into the sugar. Add the vanilla and whisk to evenly moisten. Add the eggs and whisk until foamy on top, then add the ricotta, buttermilk and butter, and whisk until well blended. Add the flour mixture and gently stir until no traces of flour remain.
  3. Step 3 Generously butter the griddle, then drop a scant ¼ cup batter onto it. Repeat, spacing the rounds at least an inch apart. Cook until the bottoms are golden brown and the tops are bubbling, 2 to 3 minutes. Flip and cook until the other sides are golden brown, about 2 minutes more. Repeat with more butter and the remaining batter. Serve warm, slathered with butter and blueberry syrup or other toppings if you’d like.

Grandma Rosie’s Apple Pie

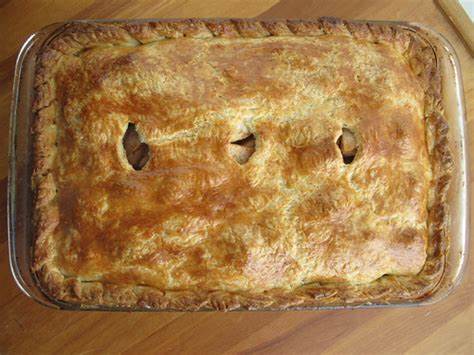
This recipe was passed down through our family. It was originally made with Crisco, and then margarine, but I use butter instead. It makes one large rectangular pie. (Pyrex® Oblong Baking Dish) Honestly, this is my best recipe. I will give you the exact measurements for the dough, how many apples to use, but the taste of the apples, after adding sugar, cinnamon, lemon juice, and a little flour, is up to you.

Dough:
Mix well, 3 cups all purpose flour
1/2 cup sugar
2 teaspoons baking powder 
A pinch of salt 

Add: Two sticks of cold unsalted butter

Cut butter into the flour so it resembles wet sand. Do not use your fingers; use 2 forks or your Kitchen Aid dough hook.

Add: 2 eggs
2 teaspoons vanilla 
Lemon juice (The recipe states that if the dough is too dry, add some lemon juice.  However, I always add lemon juice – 1-2 tablespoons. It makes a flakier crust.)
Refrigerate for at least one hour

Filling:
Peel and core 10-11 large apples, and cut into slices. (Use a selection of apples, including Honeycrisp.)
Add sugar, cinnamon and lemon juice to taste. (You might need more sugar than you think. Go slow.)
Add 2 tablespoons of flour.

Assemblage:
Preheat oven to 400F. Generously butter the baking dish. Remove one disc of dough from the refrigerator and, using a pin, roll it out on a lightly floured piece of parchment paper until it’s roughly the size of the dish. If dough is too wet, slowly sprinkle more flour onto the pin and the dough until it rolls smoothly. Place dish on top of dough, slide hand under parchment and then flip the dough over onto the plate. Carefully peel off parchment paper. Trim the dough and place aluminum foil, with dry beans on top, to keep the shape of the crust. (I usually trim the dough to just fit the bottom of the plate, so the sides of the dough don’t slide down.)

Bake at least 15 minutes, or until the dough feels a little firm.

Fill the crust with the prepared apples, *roll out the top dough, cover the pie, and brush with an egg wash (optional). Make slits in several places.

Turn oven down to 350° and bake until the dough is a little bit brown.
The apples will not be ready at this point. Loosely cover the pie with aluminum foil and turn down the oven to 300 or 325° to finish baking.

When you start to smell the pie, check to see if the apples are soft and juicy; it should be ready.

*After the top dough is rolled out, I roll it up in the parchment paper, shake out the excess flour, and unroll it onto the apples. Trim.


Newport, Rhode Island

I recently returned to my home state of Rhode Island and spent the weekend in Newport with my family. I haven’t visited this beautiful New England city in many years and was surprised to see its many changes. It’s known as a summer resort and is famous for its beaches, historic mansions and its rich sailing history. While visiting Fort Adams State Park, we chanced upon teens, enrolled in an advanced sailing program, who just finished racing each other.

We also walked the Cliff Walk, a 3.5-mile elevated, winding path along Newport’s shoreline with spectacular views of Narragansett Bay. (I only walked half!) It passes in front on some of Newport’s mansions from the Gilded Age, the most famous of which is The Breakers, formally the home of one of America’s wealthiest families, the Vanderbilts.

Of course, food was a major part of the experience, and it didn’t disappoint. We had a wonderful meal at The Mooring, where the seafood was fresh and delicious (dessert was the best!) and a brunch at Belle’s Cafe, which featured twin lobster rolls. It’s located in the heart of Safe Harbor Newport Shipyard, so after our meal, we took a leisurely tour of the amazing yachts docked there.

I definitely recommend taking a trip there. Summer may be a bit crowded, but spring or fall would be perfect.

The Vanderbilt Mansion from Cliff Walk
Belle’s Cafe, dockside dining

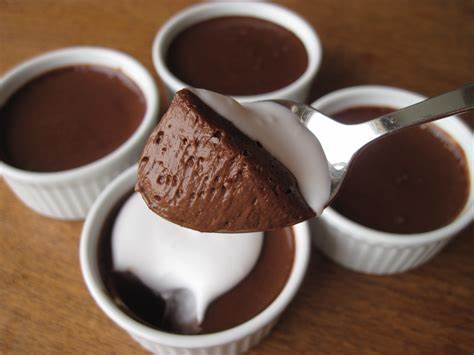
Chocolate Pots

Recipe from The Real Emily in Paris!

I had this “warm chocolate cake” at a bakery/tearoom in Williamsburg. This is it!

  •    100g butter, plus extra to grease (1 stick)
   •    100g dark chocolate, chopped ( 4oz. bar)
   •    150g light brown soft sugar (3/4 cup and 1-2 Tablespoons more if needed)
   •    3 large eggs
   •    ½ tsp vanilla extract
   •    50g plain flour (3/8 cup; use a 1/2 cup and fill 3/4’s of the way)
   •    Pinch salt


   1.    Heat oven to 180C (350F). Butter 6-8 ramekins (depending on their size) and place on a baking tray.
   2.    Put 100g butter and 100g chopped dark chocolate in a heatproof bowl and set over a pan of hot water (or alternatively put in the microwave and melt in 30 second bursts on a low setting) and stir until smooth. Set aside to cool slightly.
   3.    Using an electric hand whisk, or whisk by hand, mix in 150g light brown soft sugar, then 3 large eggs, one at a time, followed by ½ tsp vanilla extract, a pinch of salt and finally 50g plain flour. Divide the mixture among the ramekins, filled to about 3/4 of the way up.
   4.    Bake for 10-12 mins until the tops are firm to the touch, but the middles still feel squidgy. You can also keep them in the fridge or freezer until you’re ready to bake them. Can be cooked straight from frozen in about 16 mins.

Serve warm with lightly sweetened whipped cream or vanilla ice cream.

Notes: I used a Ghiradelli !00% Cacao Bar. (My daughters used a Ghiradelli 60% Cacao bar.) Checked the cups after 10 minutes but they needed more time for tops to feel firm. Total baking time was about 13-14 minutes.

Miss Ada

A Mediterranean Restaurant in Fort Greene, Brooklyn

We took Eater.com’s advice and tried Miss Ada’s for lunch, and what a lunch it was! We didn’t make a reservation, since we read that 1/3 of the dining room is set aside for walk-ins. Not the best table, but once the food arrived, and it arrived fast, we no longer noticed. We started with an order of fluffy pita bread (amazing) and a few sharable dips – Whipped Ricotta, and Babaganoush (whipped eggplant, tahini, garlic, lemon juice) and moved on to Sabich, another eggplant dish, and Merguez, a dish with ground lamb, harissa , pickles, and egg. We actually had to stop there (too full), even though the menu was so enticing, like Chicken Schnitzel, Shakshuka, or Lamb or Chicken Shawarma to mention just a few.

I wondered why this Israeli restaurant is called, Miss Ada. From their website, “the name originates from the Hebrew word for restaurant, MISADA. The root of the word, “SEUDA”, represents coming together to the dinner table with family and friends to relax and discuss the day together.”

Make that reservation. You might get a better table to relax and enjoy. We will on our return.

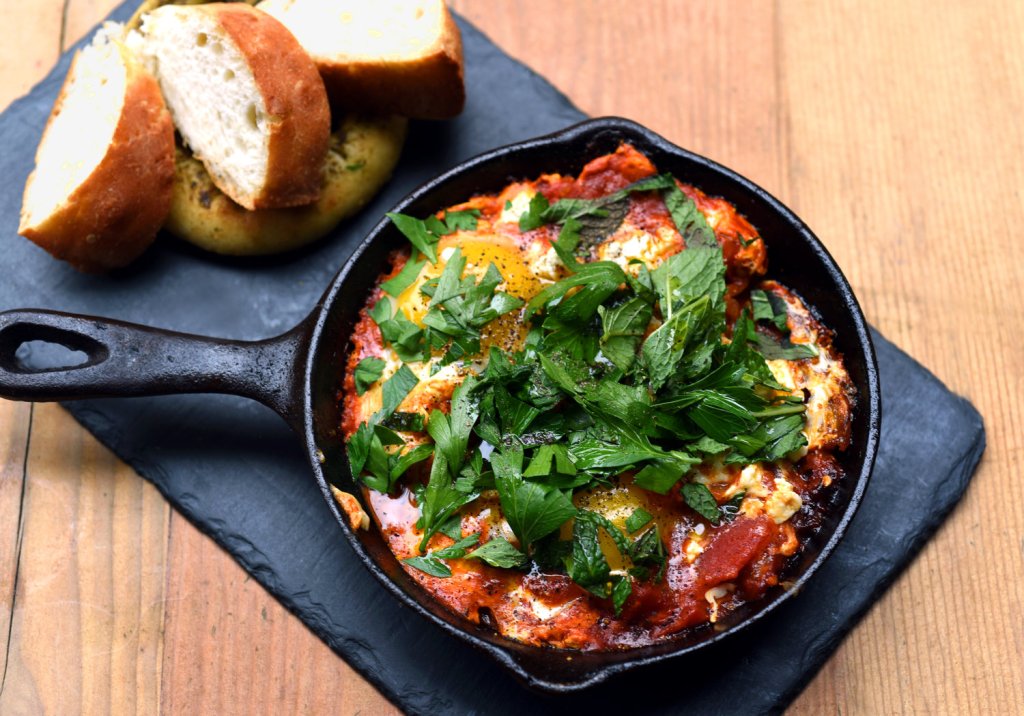
Shakshuka

Beef Stew + Beef Brisket Updated 2/10/25

My daughters found this recipe, made it, and passed it on to me. I have been looking for a basic stew recipe for ages and have been disappointed each time. This one does not fall short!

Beef Stew from the Real Emily in Paris!

• 1 large onion
• 3 carrots
• A few celery branches
• Chuck steak, about 200/250g per person (about 1/2 pound)
• Olive oil (For more flavor, use half olive oil, half butter.)
• Salt & Pepper
• Other vegetables, herbs or garlic, etc. if you have them/want to. It’s a very flexible recipe.
1. Finely chop the onion and brown in some oil in either a wide saucepan or a la Creuset type casserole dish. This step always takes much longer than you think, so take your time and let it really cook through. You’re building flavor.
2. Peel the carrots and roughly chop them and the celery. You want to end up with quite large pieces as they are going to simmer for hours. (Smaller pieces will turn to mush). 
3. Add to the pan and brown, then sear the meat. (You can take the vegetables out for this step or leave them in, depending on the level of effort you feel like and the size of your pan).
4. Once everything is nice and seared, put all the ingredients back in the pan. Add 1 generous tablespoon of tomato paste and mix until meat and veggies are coated. Then add about 1/2 cup of red wine and enough water so that everything is just covered. Give a good shake of salt and pepper. Put the lid on and either simmer on low on the stove or put into an oven between 140-160C. (300-320F).
5. Leave for 2-3 hours and remove the lid for the last 20 minutes or so of cooking. Taste for salt and pepper. You can thicken the sauce if necessary with a teaspoon of cornflour (or flour) mixed into a little water, but I usually don’t find the need to. Serve with mashed potato, rice or other grain.

Note: I made this recipe with 2 pounds of beef and increased the amount of vegetables. Chuck steak shouldn’t be too lean. A little fat adds to the flavor. Large chunks of potatoes can also be added to the stew about 45 minutes before stew is finished. Not necessary to sear them.

Beef Brisket

Ingredients:

Four pounds of brisket with a fat cap. (Remove before serving, if desire.)

2-3 large onions; 2-3 cloves of garlic

2-3 large carrots, cut into chunks

2-3 Tablespoons white or red wine (no more than 1/4 cup)

Olive Oil (For more flavor, use half olive oil, half butter.)

salt, pepper, soy sauce

3-4 peeled, whole potatoes

Procedure:

Season both sides of meat generously with salt and pepper. Sear brisket on both sides in oil. Remove to a plate. Slice the onions and brown in remaining oil. Add garlic; add carrots. Sauté until a little brown. Scrape up bits and pieces then add meat back in, plus any accumulated liquid. Add wine and 1 cup of water. With a good shake of salt and pepper, cover, and bake in 300* oven for about 3 hours or until meat is quite tender when probed with a fork. Baste occasionally. Add additional salt and pepper as needed.

Note: While it was simmering, I used soy sauce to flavor the meat and the braising liquid.

About 1/2 way through, nestle whole potatoes into the braising liquid. Drizzle soy sauce over them.

Mushroom Barley Soup

This is a mixup of several recipes

Ingredients:

1 cup minced onions

2-3 cloves minced garlic

1 pound mixed mushrooms, sliced ( I used cremini and shiitake)

1/2 cup pearl barley

1 cup finely minced celery

4 Tablespoons butter or olive oil (or 2 Tablespoons olive oil and 2 Tablespoons butter)

2 cups beef broth (preferably home made)

splash of white wine

salt, pepper to taste

Directions:

Bring a pot of water to a boil and add a teaspoon of salt. When the water boils, add the barley and boil gently, uncovered, until the barley is soft. Drain and save the cooking water.

Melt the butter/oil in a large soup pot, sauté the onions, celery and garlic for a few minutes. Add the mushrooms and sauté for another 10 minutes, stirring often until the mushrooms lose their moisture and brown a bit. Add a splash of white wine, and let it bubble to evaporate for a minute or two.

Add the beef broth, barley and enough of the cooking water to cover the vegetables and then some. Let simmer, partially covered, for several minutes to let flavors mingle. Add salt and pepper to taste.

Puréed Cauliflower Soup

I recently ate in a seafood restaurant and had a wonderful puréed asparagus soup. The waiter insisted that it was purely vegan, so I decided to try and duplicate the recipe at home. It was delicious! I was so inspired that the next time I substituted cauliflower for the asparagus, and another time, broccoli.

Here are the results of my experiments.

Wash and slice 2 leeks (white and light green parts) and 2 large Yukon gold potatoes, and sauté them in a generous amount of olive oil. Then add either 1 bunch of washed, cut asparagus, or a head of washed and cut up cauliflower, or 1 bunch of washed and cut up broccoli. Put a cover on the pot to steam all of the vegetables together. Then add water to cover, with a splash of white wine. Bring the soup to a boil, and then a simmer until all the vegetables are soft. Purée the soup with an immersion blender and add salt (and pepper) to taste. Instead of wine, or even with the wine, add fresh lemon juice at the end, again to taste. To serve, add:

  • chopped fresh parsley leaves
  • swirl of olive oil

The soup can be made using half water and half chicken stock instead of water and wine, but additional lemon juice still might be necessary.

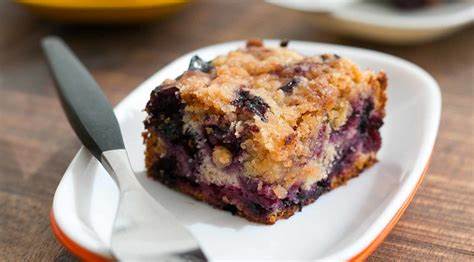
Sour-Cream Coffee Cake by Robert Farrar Capon, NYT Cooking

I have been looking for a sour-cream coffee cake recipe for awhile. This is a good one. It’s quite rich, so your serving sizes don’t need to be large. (The streusel topping calls for 1/2 cup sugar. I reduced it to 1/4 cup sugar. It was sweet enough.)

INGREDIENTS

Yield: About 12 servings

  • ½ cup/113 grams unsalted butter at room temperature
  • 1¼ cups/260 grams sugar
  • 2 large eggs
  • 1½ cups flour/188 grams
  • 1½ teaspoons baking powder
  • ½ teaspoon baking soda
  • ½ teaspoon salt
  • 1¼ cups/300 grams sour cream
  • 1 teaspoon vanilla
  • For the Topping
  • ½ cup/104 grams sugar
  • 2 teaspoons all-purpose flour
  • 1 tablespoon cinnamon
  • ⅓ cup/70 grams chopped pecans or walnuts

PREPARATION

  1. Step 1: Preheat oven to 350 degrees and generously butter a 9-by-13-inch baking pan. Cream butter and sugar together until light and fluffy. Add eggs one at a time, beating well after each addition. (I used a square 8″ by 8″ glass baking dish.)
  2. Step 2: In a separate bowl, sift flour with baking powder, baking soda and salt. With the mixer on low speed, add the flour mixture to the butter mixture alternately with sour cream and vanilla until just combined. Do not over mix. Pour batter into prepared baking pan.
  3. Step 3: Make the topping: Combine sugar, cinnamon, flour and nuts in a small bowl and mix well.
  4. Step 4: Sprinkle the topping evenly over the cake and bake 30 to 35 minutes, or until a cake tester comes out clean. Cool, cut into pieces and serve.