pasta from ‘the bear’ (spaghetti pomodoro)

After watching this show on Hulu, I was inspired to make the vegetarian tomato sauce featured in the last episode. It is a wonderful sauce, however I needed to add some honey (or sugar) to offset its acidity. One recipe I found online adds 1/2 teaspoon of baking soda instead but have never tried this.

Ingredients:

1/2 cup of olive oil

6 cloves garlic

¾ teaspoon hot pepper flakes or adjust to your taste (optional)

1/2 -3/4 cup of basil leaves, packed

1/2 cup of butter

1 onion peeled, cut in half

3 cups of San Marzano tomatoes

1/2 of a fresh, ripe tomato (optional)

1 pound of spaghetti or fettucine

1/2 cup parmesan cheese for serving + extra basil leaves

salt, pepper and sweetener to taste

INSTRUCTIONS 

  • Add oil, garlic, hot pepper flakes, and basil to a small saucepan. Heat over medium low. Once the ingredients start to sizzle, cook for 45 seconds – 2 minutes, until the basil is starting to wilt. Remove from the heat and set aside. 
  • Melt the butter in a Dutch oven over medium heat. Add the onion, cut side down. Cook for 4-5 minutes, until it’s just starting to brown. Add the San Marzano tomatoes, and mash with a potato masher until they are broken up into chunks. (Add 1/2 of a fresh, ripe tomato now.)
  • Bring to a simmer, reduce heat to medium low, and simmer for 20-25 minutes. 
  • Meanwhile, make your spaghetti according to package directions, minus 2 minutes. You want to get the pasta out just before it’s al dente so it can finish cooking in the tomatoes. 
  • Pour your cool(ish) oil in a food processor, and chop. 
  • Add the oil to the tomatoes, and simmer for another five minutes. 
  • Remove the onion. Taste for salt and pepper, and adjust accordingly. Add the spaghetti, cook for another two minutes until al dente. (Or, finish cooking pasta, drain and add sauce.)
  • Remove to a serving platter, sprinkle with parmesan cheese and fresh basil leaves, and a drizzle of good olive oil.
  • Enjoy!

Note: I add 1/2 of a fresh, ripe tomato to the sauce when it is cooking and mash it into the sauce when it’s finished.


Potato Korokke

A NYT Recipe By Bryan Washington

Korokke, or Japanese croquettes, are comforting oval-shaped staples. The dish was introduced to Japan in the late 1800s and is said to have descended from French croquettes. These potato korokke consist of mashed potatoes folded into a mixture of onion, grated carrot and ground beef. Leftovers can be reheated.

INGREDIENTS

  • 4 medium russet potatoes (2 1/2 pounds)
  • 2 tablespoons unsalted butter
  • 1 tablespoon neutral oil, such as canola, plus more for frying
  • ½ white onion, minced
  • 1 medium carrot, peeled and shredded (optional)
  • ½ pound ground beef (I used 3/4 pound)
  • 1 tablespoon soy sauce
  • 1 teaspoon granulated sugar (Sugar may not be necessary if using shredded carrot.)
  • ½ teaspoon ground black pepper, plus more to taste
  •  Salt
  • ½ cup all-purpose flour
  • 2 large eggs
  • 2 cups panko bread crumbs
  •  Tonkatsu sauce, store-bought

PREPARATION

  1. Set a medium pot of water to boil. As the water heats, wash, peel and quarter potatoes.
  2. Set potatoes in boiling water and cook until they’ve softened enough to pierce easily with a fork, 20 to 25 minutes. Drain potatoes in a colander. While potatoes are still warm, return them to the pot. Mash them until you’re left with a fluffy mixture, fold in butter until melted and set aside.
  3. While potatoes simmer, prepare the meat: Heat a skillet over medium, and add 1 tablespoon oil. Add onion and cook, stirring often, until softened, 3 to 4 minutes, then add the carrot and the beef. Cook, breaking the meat into bits, and add soy sauce, sugar and pepper. Continue cooking and stirring until the meat is cooked through, 3 to 4 minutes.
  4. Add beef mixture to mashed potatoes in pot, and stir until thoroughly mixed. Season with salt and pepper to taste. Let mixture cool until it’s warm (but not cold).
  5. With your palms, form the warm mixture into 1-inch-thick oval-shaped patties no longer than 3 inches in length. Set the patties on a baking sheet as you form them. You should end up with 10 to 12 patties.
  6. Cover the patties loosely with plastic wrap, and refrigerate to cool for 30 minutes. Meanwhile, organize your breading station: Place flour in a shallow plate, beat eggs in a shallow bowl and spread panko on another plate.
  7. Remove patties from fridge, and begin the breading process: Dip 1 patty into flour, covering completely. Then transfer to the beaten egg, covering completely. Then transfer to the panko, being sure to cover each patty completely. As you complete each patty, set back on the baking sheet before continuing with the next patty.
  8. Fill a medium saucepan with oil to a depth of 1 1/2 inches and heat to 340 degrees. Deep-fry korokke in batches of 2 at a time. (If you add too many, the oil’s temperature will drop too drastically.) Fry, turning once, until golden brown, about 3 minutes. They’re already cooked inside, so use their color as your guide. Transfer to a cooling rack or a plate lined with paper towels, and repeat with the remaining korokke. Continually regulate the oil’s temperature throughout — if the heat is too high, the korokke will burn, and if it’s too cold, then your korokke will be soggy.
  9. Serve hot, with tonkatsu sauce, if you’d like.

Panko Bread Crumbs and Tonkatsu Sauce can be bought in an Asian Food Market.

Meat Sauce for Pasta

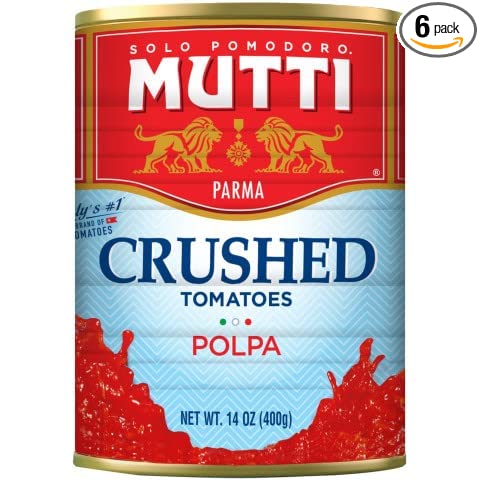
Many years ago I was given this recipe by a friend of my daughter’s, and I wish to share it with you. I prefer using Mutti crushed tomatoes, but any brand will do.

Ingredients:

1 large finely diced onion

2-3 cloves of finely diced garlic

2 stalks of finely diced celery

2 medium shredded carrots

1 pound of 80% ground chuck

1 – 28 oz. can and 1 – 14oz can of crushed tomatoes

olive oil

2 bay leaves

salt, pepper and if needed, honey to taste

Directions:

Cover the bottom of a good stockpot with a coating of olive oil. Heat. Add diced onion and garlic and sauté until onion is translucent. Then add celery and carrots. When vegetables are soft, add the beef, break it up and mix it into the vegetables. When beef has browned, add cans of crushed tomatoes. Fill the empty 14oz. can with water, pour that into the empty larger can, and then pour the tomato water into the sauce. Stir and lower flame so sauce is just barely simmering. Add bay leaves and some salt and pepper at this point. Let the sauce cook for several hours, perhaps 3 to 4, stirring from time to time, until sauce thickens. When it has reached the desired consistency, adjust the salt and pepper. If it is too sour, add honey, a little at a time, to taste. Serve over pasta.

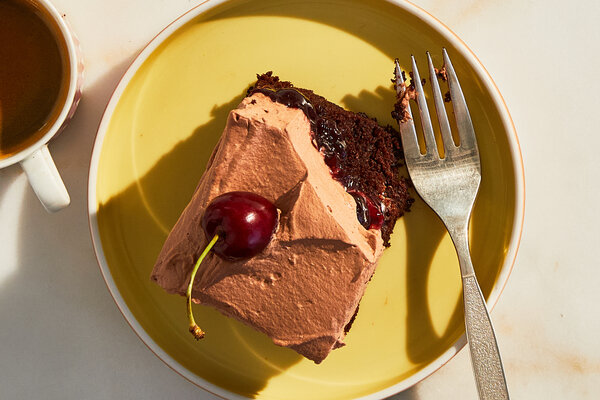
Chocolate Cherry Cake

NYT recipe by Eric Kim

This lovely dessert is topped with an airy whipped cream frosting and has a cherry-red layer of preserves which keeps the crumb moist and tender.

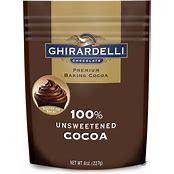
“The cake’s dark chocolate flavor is enhanced by Dutch-processed cocoa powder, which produces a much deeper, Oreo-like chocolaty taste than natural unsweetened cocoa powder. “

INGREDIENTS

FOR THE CAKE:

  • ½ cup/118 milliliters extra-virgin olive oil, plus more for greasing pan
    • I substituted 1/2 cup of melted butter for the oil. If the butter lumps together when added to the eggs, milk, almond extract and salt, don’t worry. Continue with the recipe. The lumps will melt in the baking. I also used butter to grease the pan.
  • 1 ¼ cups/250 grams granulated sugar
  • 1 cup/128 grams all-purpose flour
  • ½ cup/56 grams Dutch-processed cocoa powder
  • 2 teaspoons baking powder
  • 2 large eggs
  • ¾ cup/180 milliliters whole milk
  • 1 teaspoon pure almond extract
  • ½ teaspoon coarse kosher salt or 3/4 teaspoon Diamond Crystal kosher salt
  • 1 cup/305 grams cherry preserves (see Tip)

FOR THE FROSTING:

  • ¼ cup/50 grams granulated sugar
  • ¼ cup/28 grams Dutch-processed cocoa powder
  •  Pinch of kosher salt
  • ¼ cup boiling hot water
  • 2 cups/473 milliliters cold heavy whipping cream
  •  Fresh red cherries, for garnish (optional)

PREPARATION

  1. Prepare the cake: Heat the oven to 350 degrees. Grease an 8-inch square baking pan with olive oil.
  2. In a medium bowl, whisk together the sugar, flour, cocoa powder and baking powder until evenly distributed and no lumps remain. To a separate large bowl, add the 1/2 cup oil, eggs, milk, almond extract and salt and whisk until smooth, at least 30 seconds. Gently whisk the dry ingredients into the wet ingredients until the last streak of flour disappears.
  3. Transfer the batter to the prepared pan and tap gently against the counter to pop excess air bubbles. Bake until a skewer or cake tester inserted in the center comes out clean, 30 to 40 minutes. Let cool completely in the pan.
  4. Microwave the cherry preserves in a small bowl in 30-second intervals or in a small saucepan over medium heat until looser and slightly liquidy. Spread the preserves evenly over the cooled cake.
  5. Make the frosting: In a large bowl, combine the sugar, cocoa powder and salt and pour over the hot water. Either by hand or with an electric mixer, whisk until smooth. Add the heavy cream and continue whisking until billowy soft peaks form. When you turn the whisk upside-down, a peak of cream should flop over slightly like a Santa hat. Spread the frosting over the cake and, if using, garnish with the cherries. Serve immediately or cover and refrigerate until ready to serve.

Tip

  • Look for a brand of cherry preserves with minimal ingredients: It should consist of only cherries, sugar, pectin and some kind of citrus. That will taste more tart and less artificial than one with, say, high-fructose corn syrup and other fruit juices that muddy the natural cherry flavor.
Dutch-processed cocoa powder

Peach Poundcake

By Jerrelle Guy

This is a delicious, moist cake that can be wrapped tightly with plastic wrap and stored on the counter for up to 3 days. Puréed peaches (plus an extra egg yolk) keep the cake from drying out. Diced peaches add bursts of fresh fruit, and a peach glaze lends another layer of flavor. Use sweet, ripe peaches for best results, but frozen work fine here, too. (I used both.)

Ingredients

*Yield: 1 (9-by-5-inch) cake: Not all of the batter fit into my loaf pan, so I made an extra cupcake with it.

  • 1 cup/230 grams unsalted butter (2 sticks), melted and cooled to room temperature, plus more for greasing the pan
  • 2½ cups/320 grams all-purpose flour, plus more for dusting the pan
  • 3 medium, ripe, red-hued peaches (about 1 pound), pitted (see Note)
  • 1 tablespoon fresh lemon juice
  • 3 large eggs plus 1 large egg yolk, beaten
  • 1½ teaspoons vanilla extract
  • 1 cup/125 grams unsifted confectioners’ sugar, plus more as needed
  • 1½ cups/300 grams granulated sugar
  • 2½ teaspoons baking powder
  • ¾ teaspoon kosher salt

Preparation

  1. Heat oven to 325 degrees. Lightly butter and flour a 9-by-5-inch loaf pan, and set aside.
  2. Dice 1 peach into ⅓-inch pieces. Pat the pieces dry with a paper towel and set aside.
  3. Add the remaining 2 peaches and the lemon juice to a food processor or blender, and blend on high until completely puréed. Measure out 1 leveled cup of the purée and transfer it to a mixing bowl along with the melted butter, eggs, egg yolk and vanilla. Whisk to combine and set aside.
  4. Completely scrape down the sides of the food processor, and make the icing using the small amount of puréed peaches still remaining: Add 1 cup of the confectioners’ sugar to the remaining peach purée in the food processor and blend on high until combined. The icing should be thick but thin enough to drizzle. Add more confectioners’ sugar to thicken or a splash of water to thin, as needed. Cover and set aside until it’s time to ice the cake.
  5. In a large mixing bowl, add the flour, granulated sugar, baking powder and salt, and whisk to combine. Pour the peach mixture into the flour mixture, and whisk well until the batter is thoroughly combined, then fold in the diced peaches. Transfer the batter to the loaf pan, spread evenly to the edges, and bake until crusty and golden brown on the top and a toothpick inserted into the center comes out clean, 75 to 80 minutes. Remove from the oven and allow to cool for 10 minutes before transferring to a wire rack.
  6. Stir the icing a final time and spread it on top of the warm cake, allowing the extra icing to drip down the sides. Cool the cake to room temperature. Slice and serve.

Tip

  • Use the boldest-colored peaches you can find, as their skins will lend blush to the glaze. However, you can also peel the peaches, if you mind the specks of skin.

Coleslaw

By Kay Chun

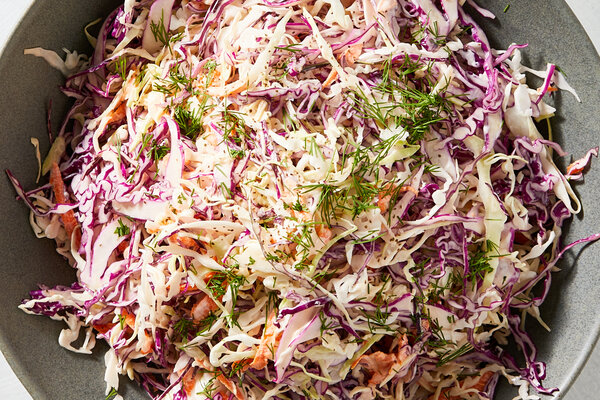
This classic version of coleslaw is also the simplest, with a light, creamy, tangy-sweet dressing spiked with celery seeds. For the best result, make the coleslaw a few hours ahead and refrigerate it to allow all the flavors to marry and soak into the cabbage. Celery seeds add strong, aromatic, grassy notes, but simply skip them if they’re unavailable.

INGREDIENTS

  • 1 cup mayonnaise
  • 1 tablespoon apple cider vinegar
  • 1 tablespoon granulated sugar
  • ½ teaspoon celery seeds
  •  Kosher salt and black pepper
  • 1 medium head green cabbage (about 2 pounds)
  • ½ medium head purple cabbage (about 1 pound)
  • 2 carrots, grated on the large holes of a box grate

PREPARATION

  1. In a very large bowl, combine mayonnaise, vinegar, sugar and celery seeds. Season with salt and pepper, and mix until smooth.
  2. Shred the cabbage: Using a sharp knife, quarter and core the green cabbage. Arrange quarters cut side down, so they sit flat and stable. Thinly slice them lengthwise for longer shreds (or crosswise for shorter shreds). Repeat with the purple cabbage. You should get about 16 total cups of shredded green and purple cabbage.
  3. Add all the shredded cabbage and the shredded carrots to the bowl, season with salt and pepper, and toss until well combined. (Hands work best here.)
  4. Transfer coleslaw to a serving bowl and serve immediately, or cover and refrigerate 3 hours ahead of time and up to overnight for the best texture, and serve chilled.

Note: McCormick celery seed can be found in the spice section of your local market, or instead, you could add ½ cup of your favorite chopped fresh herb.

Sweet and Sour Slaw

I found this Mayonnaise less Southern slaw many years ago in the NYT and have been making it ever since. It has become a “hit” at every festive gathering!

Ingredients:

1 head of green cabbage, cored, washed and finely shredded

1 small red onion finely diced

1 red pepper finely diced

1 teaspoon caraway or celery seed

1 teaspoon mustard seed

salt and pepper to taste

1/2 cup sugar

1 1/2 cups apple cider vinegar

1/2 cup of olive oil

Directions:

In a large bowl, mix together cabbage, onion, and peppers. In a small saucepan, combine the spices, sugar, vinegar and oil. Bring to a boil, and pour over the cabbage mixture. Chill and serve.

Note: I usually drain the liquid off the slaw before serving, then adjust seasoning.

Before adding dressing

Marcella Hazan’s Pesto

by the food processor method.

This is a wonderful way to enjoy and use the fresh basil you find at this time of year. For me, I found that 1/3 of a cup of parmesan cheese (does not have to be freshly grated) and 1 1/2 tablespoons of butter is enough. Adjust seasoning to your taste.

INGREDIENTS

DIRECTIONS

  • Briefly soak and wash the basil in cold water, and gently pat it thoroughly DRY with paper towels.
  • Put the basil, olive oil, pine nuts, chopped garlic, and an ample pinch of salt in the processor bowl, and process to a uniform, creamy consistency.
  • Transfer to a bowl, and mix in the two grated cheeses by hand. It is worth the slight effort to do it by hand to obtain the notably superior texture it produces.
  • When the cheese has been evenly amalgamated with the other ingredients, mix in the softened butter, distributing it uniformly into the sauce.
  • When spooning the pesto over pasta, dilute it slightly with a tablespoon or two of the hot water in which the pasta was cooked.

Honey-and-Soy-Glazed Chicken Thighs

By Kay Chun

This is another tasty, simple, weeknight recipe. Chicken thighs are tossed with a sweet-salty glaze made of honey and soy sauce that caramelizes into a sticky coating as it roasts in the oven.

INGREDIENTS

  • 2 tablespoons canola oil
  • 1 tablespoon minced garlic
  • 1 tablespoon minced ginger
  • 6 tablespoons low-sodium soy sauce (see tip)
  • 5 tablespoons mild honey, such as clover, acacia or orange blossom
  • 3 tablespoons unsalted butter
  •  Kosher salt and black pepper
  • 8 small bone-in, skin-on chicken thighs (about 3 pounds)
  •  Lemon wedges, for serving

PREPARATION

  1. Heat the oven to 425 degrees. Heat 1 tablespoon oil in a small saucepan over low heat. Add the garlic and ginger and cook, stirring occasionally, until softened, 3 minutes. Add the soy sauce and honey and simmer, stirring occasionally, until reduced and slightly thickened, about 10 minutes. (You’ll want to cook attentively for this step, as the syrupy mixture can burn if it cooks too long.) Turn off the heat then whisk in the butter. Season with salt and pepper.
  2. On an aluminum foil-lined rimmed baking sheet, season the chicken all over with salt and pepper. Add half the glaze and the remaining 1 tablespoon oil and toss the chicken to coat. Arrange in an even layer, skin side up, and roast until browned, 15 minutes. Brush the chicken all over with 2 tablespoons of the remaining glaze. Roast until golden and cooked through, about 10 minutes.
  3. Drizzle the chicken with the remaining glaze and serve with lemon wedges.

Tips

  • The sauce can be made ahead and refrigerated overnight; just rewarm it in the microwave or stovetop before using.
  • If gluten is a concern, substitute the soy sauce with low-sodium tamari.

Note: I found that the chicken needed additional time to roast. If necessary, lower the oven to 375 for about 10-15 minutes more. Watch that the skin doesn’t burn. Chicken was delicious the next day served cold.

Lemony Chicken With Potatoes and Oregano

By Melissa Clark

This was a lovely surprise. So easy and satisfying. “Roasting lemon slices with the potatoes infuses them with a bright, zippy flavor.”

INGREDIENTS

  • 2 lemons
  • 1 ¼ pounds bone-in, skin-on chicken thighs (2 to 3), patted dry with paper towels (see Tip)
  • 1 ¼ pounds Yukon Gold potatoes, scrubbed, halved and cut into 1/2-inch wedges
  • 1 ¾ teaspoons dried oregano, plus more for serving
  • 1 ½ teaspoons kosher salt (such as Diamond Crystal), plus more for serving
  • ¾ teaspoon freshly ground black pepper
  • 3 tablespoons extra-virgin olive oil
  •  Mayonnaise, mustard, ketchup or hot sauce, for serving

PREPARATION

  1. Heat oven to 425 degrees and, if you like, line a sheet pan with parchment paper (not essential but helpful for cleaning up).
  2. Trim the ends off 1 lemon, then cut the lemon in half crosswise.Thinly slice one half of the lemon into rounds, then cut the rounds into quarters, creating small triangles. Shake out the seeds then place the lemon quarters into a large bowl. Save the remaining lemon half for serving. Cut the remaining whole lemon into wedges, for serving.
  3. Add chicken and potatoes to the large bowl with the lemon quarters. Add the oregano, salt and pepper; toss well. (Your hands are the best tools here.) Drizzle in the oil and toss again.
  4. Arrange chicken thighs skin side up on one half of the prepared sheet pan, and potatoes and lemons on the other, spreading the potatoes out into one layer. Roast for 20 minutes. Using a long-handled spoon, stir the potatoes, then spread them out again in one layer. (You don’t have to touch the chicken.) Continue roasting until chicken and potatoes are cooked through and everything is golden and crisped, another 15 to 20 minutes (40 to 45 minutes total roasting time).
  5. To serve, squeeze the juice from the lemon half all over chicken and potatoes and give everything a good stir to incorporate all the tasty juices and browned bits at the bottom of the pan. Sprinkle with more oregano and salt, and serve with additional lemon wedges and condiments on the side.

Tip

  • You can substitute 1 1/4 pounds chicken drumsticks for the thighs, or use a combination of thighs and drumsticks. Bone-in, skin-on breasts can also be substituted; because they cook more quickly than dark meat does, you’ll need to start checking on them after 30 minutes of total roasting time.

Note: Rather than squeeze the lemon juice over the chicken and potatoes when they are done, I squeezed extra lemon juice on the chicken before baking it. The potatoes didn’t need more.