Baby Blues Lucheonette and Sazanami Curry Bar

This week I would like to recommend two very different restaurants. The first, a new, modern Greek diner in East Williamsburg, Brooklyn, and the second, a wonderful Japanese restaurant specializing in curry in Fort Lee, New Jersey.

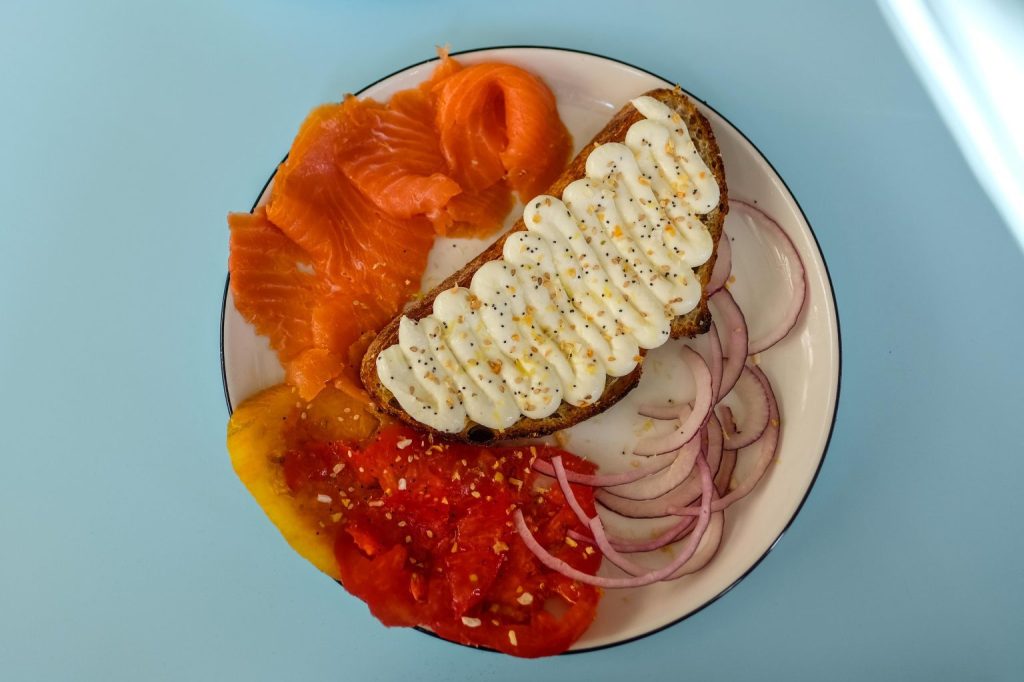
Baby Blues is “a casual (brunch and) lunch spot that serves nourishing food with no frills (ny.eater.com).” One of the menu choices is: “Like a Greek Bagel,” a slice of dense, grainy sourdough bread covered with a salty whipped feta and slices of smoked salmon and heirloom tomato on the side. There are also egg salad, grilled cheese, or bacon-egg-and-cheese sandwiches, three different Greek inspired salads, fruity bowls and toasts, including homemade banana bread covered in cashew ricotta and a crunchy baklava crumble to enjoy with their excellent coffee.

My family and I celebrated Mother’s Day with a brunch at Sazanami Curry Bar. We were very pleasantly surprised. The food was wonderful – from sushi to gyozas to the different kinds of curry (hot or mild). Everything was served with a homemade pickled cabbage, and the best dish, I thought, was pumpkin croquettes, made like the potato croquettes recipe on this blog, but using ground pork instead of beef and Japanese pumpkin. ( Kabocha or Hokkaido?) I’m trying to duplicate the recipe. Will keep you posted.

Chicken Milanese

By Alexa Weibel

Time 40 minutes

“Chicken Milanese is a simple dish that makes chicken breasts seem positively lavish. Similar to Italian veal Milanese, this classic dish pairs hot and crispy breaded chicken with a cool and lemony salad. The recipe takes a little preparation, but the execution is easy: Pound lean chicken breasts until thin, bread them, then pan-fry until the bread crumbs are golden; the crust ensures that the chicken stays moist. While not traditional, this version adds onion powder, garlic powder and grated Parmesan to the breading.”

INGREDIENTS

Yield: 4 servings

  • 1 teaspoon onion powder
  • 1 teaspoon garlic powder
  • 2 teaspoons Kosher salt (such as Diamond Crystal) and 1 1/2 teaspoons black pepper
  • 2 boneless, skinless chicken breasts (about 10 ounces each)
  • ½ cup all-purpose flour
  • 2 large eggs, beaten
  • 1 ¼ cups panko bread crumbs
  • ½ cup finely grated Parmesan
  • About 1 cup olive oil (or neutral oil), for pan-frying
  • For the Salad:
  • ½ cup shaved Parmesan
  • 3 tablespoons olive oil
  • 1 tablespoon fresh lemon juice, plus lemon wedges for serving
  • 5 ounces arugula (about 5 packed cups)
  • 1 cup cherry tomatoes (optional), halved
  • PREPARATION
  • Step 1: Prepare the chicken: In a small bowl, stir together the onion powder, garlic powder, 2 teaspoons salt and 1 ½ teaspoons pepper.
  • Step 2: Set each chicken breast on a cutting board. Set one palm on top of one breast to hold it still then use a chef’s knife with the other hand to slice the breast in half horizontally. Repeat with the second chicken breast, then, using a meat mallet or the bottom of a heavy skillet, pound each piece until no more than ⅓-inch thick. Season generously on both sides with half the seasoned salt.
  • Step 3: Set the flour and eggs into two separate shallow bowls. To a third, add the panko, finely grated Parmesan and the remaining seasoned salt and stir to combine. Dip one piece of chicken into the flour to coat all over, then transfer to the eggs and turn to coat. Add to the panko mixture and turn, pressing panko into it until fully coated. Transfer to a baking sheet and repeat with the remaining chicken. (The breaded chicken will hold in the refrigerator for a few hours.)
  • Step 4: In a medium nonstick skillet, heat a ½-inch layer of oil over medium-high. Working in two batches, add the breaded chicken and cook, undisturbed, until golden on both sides, about 3 minutes per side. (You could also cook them all at once in a large skillet, though you’ll need twice the amount of oil to do so.) Transfer to a wire rack and lightly sprinkle with additional salt, if desired.
  • Step 5: While the chicken cooks, prepare the salad: In a large bowl, whisk to combine the olive oil and lemon juice; season to taste with salt and pepper. Add the arugula, cherry tomatoes (if using) and shaved Parmesan; toss to coat then season to taste again with salt and pepper.
  • Step 6: Divide the chicken among plates and pile the salad on the side. Serve immediately, with lemon wedges for squeezing on top.

Fish Milanese

By Kay Chun

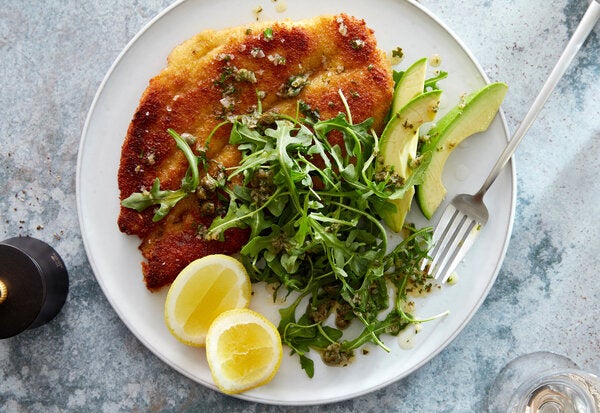
“This fast weeknight dinner features quick-cooking flounder prepared alla Milanese, the style of breading and frying meat cutlets. The fillets are lightly breaded and pan-fried until golden and crisp on the outside and tender in the middle. A lemony, brown-butter pan sauce with capers comes together quickly to add a tangy brininess to the dish. Any leftover fish makes for terrific sandwiches the next day, stacked with lettuce, tomato, pickles and mayo.”

Note: My only suggestion would be to double the recipe for the sauce. If you prefer to use less butter, substitute olive oil instead.

INGREDIENTS

Yield: 4 servings

  • ¼ cup all-purpose flour
  • 2 large eggs, beaten
  • 1 cup plain bread crumbs
  • Salt and black pepper
  • ½ teaspoon dried oregano
  • 4( 5- to 6-ounce) flounder fillets (or other thin white fish fillets)
  • 6 tablespoons unsalted butter
  • 5 tablespoons neutral oil, such as safflower or canola
  • 2 tablespoons minced shallot
  • ¼ teaspoon minced garlic
  • 2 tablespoons lemon juice, plus lemon wedges for serving
  • 2 tablespoons chopped fresh parsley
  • 1 tablespoon capers, plus 1 tablespoon caper brine
  • PREPARATION
  • Step 1: Place flour, eggs and bread crumbs in three separate shallow bowls, and season each with salt and pepper. Crumble the oregano with your fingertips and add to the bread crumbs; mix well.
  • Step 2: Season fish with salt. Working with one piece at a time, dredge in flour (shake off excess), dip in egg (shake off excess) then dredge in bread crumbs, pressing to adhere. Transfer to a large plate.
  • Step 3: In a 12-inch nonstick skillet, melt 1 tablespoon of the butter in 1 tablespoon of the oil over medium heat. Add 2 fillets and cook until golden underneath, about 3 minutes. Flip fish and cook until golden on the second side and cooked through, 2 minutes longer. Transfer to a large paper towel-lined plate, and season with salt. Wipe out skillet. Repeat with 1 tablespoon of the butter, 1 tablespoon of the oil and the remaining fish.
  • Step 4: Wipe out skillet and melt the remaining 4 tablespoons butter over medium-low heat. Add shallot and cook, stirring occasionally, until shallot is softened and butter is golden brown, about 2 minutes. Stir in the garlic until fragrant, 30 seconds. Add the remaining 3 tablespoons oil, plus the lemon juice, parsley, capers and caper brine, and mix well. Transfer the brown-butter vinaigrette to a small heatproof bowl, and season with salt and pepper.
  • Step 5: Divide the fish among the plates and drizzle with the brown-butter vinaigrette. Serve with lemon wedges.

Oven Bacon, updated

By Ali Slagle

Time: 20 minutes

I tried this recipe and was happy with the results.(Used aluminum foil – lined baking sheets!)

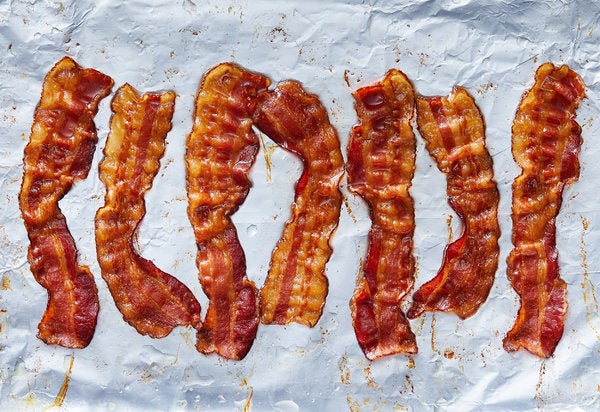
“Cooking bacon in the oven gives you perfectly crispy slices without any flipping or fussing, and the cleanup is super speedy. It’s also the best way to make bacon for a crowd. You can cook the bacon directly on aluminum foil-lined baking sheets or on a wire rack set on top of the baking sheets. The latter method will give you extra crispy bacon, but you’ll have to wash that greasy rack. Your choice!”

INGREDIENTS

Yield: 4 to 8 servings

  • 1 pound bacon

PREPARATION

  1. Heat the oven to 450 degrees. Arrange the bacon in a single layer on 2 aluminum foil-lined rimmed baking sheets, or, for extra crispy bacon, arrange on 2 wire racks set over 2 foil-lined rimmed baking sheets.
  2. Bake until the bacon is browned and starts to ripple, or to desired doneness, 10 to 20 minutes. (Because the cook time depends on the thickness of the bacon and how you like it cooked, start checking doneness at the 10-minute mark.)
  3. Transfer the bacon to a paper towel-lined plate to drain.

If You’re Cooking Bacon, a Few Chef-Approved Tips

So you’ve brought home the bacon — what now? You’ve got two main choices: Opt for pan-frying or cook in the oven. As for the chefs, the oven is, overwhelmingly, the way to go. “Stop cooking your bacon in a frying pan — this is Sisyphus’s work!” pleads Chef Morgan Jarrett of STATE Grill and Bar, the flagship restaurant of the Empire State Building. “Instead, take a small sheet tray and line it with parchment paper. Lay the bacon in a single layer, and cook it at 350ºF.” After about six to eight minutes, much like you’d do while tanning on a hot beach, give that bacon a flip.

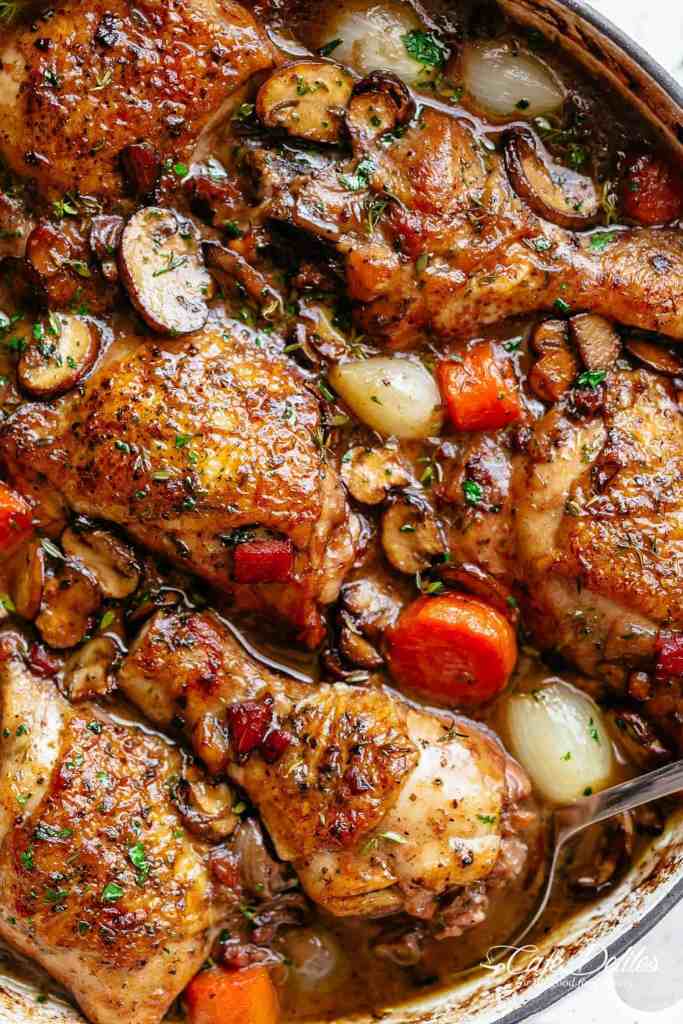
Coq Au Vin

Coq Au Vin, or chicken in wine, is a popular classic French dish made easy in one pan! With crispy chicken drumsticks, chicken thighs and bacon, this Coq au vin gets everybody talking! Serve with creamy mashed potato or cauliflower smothered with butter( or plain rice), and the most delicious chicken dinner is ready on the table!

Ingredients

  • 2 tablespoons olive oil
  • 4 ounces (120g) diced bacon
  • 8 chicken pieces (4 drumsticks and 4 thighs), skin on, bone in
  • 2 teaspoons salt (plus more to season)
  • 1/2-1 teaspoon freshly ground black pepper (plus more to season)
  • 1 onion, diced
  • 8 oz (250g) carrots cut into 1-inch pieces
  • 4 cloves garlic, minced
  • 1/4 cup brandy (OPTIONAL) (I used 1/8 cup.)
  • 350 ml  (1+1/2 cups) good quality red wine (Burgundy, Pinot Noir, Shiraz) (I used 1 cup.)
  • 1 1/4 cups low sodium chicken stock or broth
  • 5 sprigs thyme
  • 3 tablespoons unsalted butter at room temperature, divided
  • 1 1/2 tablespoons all-purpose flour
  • 8 ounces (250g) frozen small whole onions (pearl onions, if you can find them.))
  • 8 ounces (250g) cremini (brown) mushrooms thickly sliced
  • 2 tablespoons fresh chopped parsley, to garnish (optional)

Instructions

  • Preheat the oven to 350°F | 175°C.
  • Heat the olive oil over medium heat in a large pot or Dutch oven. Add the bacon and cook until crispy (about 8 to 10 minutes). Transfer bacon to a plate with a slotted spoon.
  • Pat chicken pieces dry with paper towel and season with salt and pepper. (Don’t skip this step, otherwise oil will splatter!)
  • Add the chicken pieces in batches of two to the leftover bacon grease (skin side down for chicken thighs). Sear for about 5 minutes each side, until skin is rendered, crispy and browned. Transfer chicken to the plate with the bacon. Set aside.
  • Add the onions, carrots, salt, and pepper to the pan and cook over medium heat for 5 minutes, while stirring occasionally, until the onions are transparent and lightly browned. Add the garlic and cook until fragrant (about 1 minute). 
  • Pour in the Cognac/brandy, wine and chicken stock; stir to combine. Add the thyme, bacon, chicken, and any juices leftover from the plate into the pot. Bring to a simmer, then cover with a lid or foil and transfer to the oven for 20-30, or until the chicken is cooked through and no longer pink in the middle. (This step may take longer.)
  • While chicken is in the oven, melt 2 tablespoons of butter in a pan over medium heat. Cook the mushrooms for 8 to 10 minutes, until soft and browned. Set aside.
  • Remove casserole from oven and place on stove. Mash the remaining butter with the flour and stir into the casserole (the heat will cook any lumps out). Add the pearl onions, mushrooms; bring the casserole to a simmer and cook for a further 10 minutes, until sauce has thickened. Season to taste, if desired. Garnish with parsley and any extra thyme leaves, and serve immediately over mashed potatoes. (This recipe took more seasoning than usual. I added quite a bit of salt to taste.)
  • Adapted from Ina Garten
  • OPTIONAL: BROIL AT THE END OF COOKING TO GET A NICE, GOLDEN SKIN ON THE CHICKEN.

Waffles

This is another really good recipe from Melissa Clark.

It’s time to put that waffle iron languishing in the back of your cabinet to good use. These airy, delicate and crisp-edged waffles are so fabulous, yet so simple to throw together, they’re destined to become part of your weekend breakfast routine. Freeze leftovers, if you have any, in Ziplock bags and serve them during the week. You can pop them in the toaster to reheat (use a light setting) and they come out nearly as well as freshly made, maybe even slightly crunchier. 

For a lighter, fluffier waffle, separate the eggs and proceed with step 2 using the egg yolks. Beat the whites until stiff, then fold into the batter. For whole-grain waffles, use 1⅓ cup all-purpose flour and ⅔ cup whole-wheat flour. You can also substitute brown sugar for the granulated.

INGREDIENTS

Yield: about 10 waffles

  • 6 tablespoons unsalted butter, more for waffle iron
  • 2 cups/240 grams all-purpose flour
  • 1 tablespoon/15 grams sugar
  • 1 teaspoon/8 grams baking powder
  • 1 teaspoon/5 grams fine sea salt
  • ½ teaspoon/3 grams baking soda
  • 1 cup plain yogurt (or see Tip)
  • 1 cup milk
  • 4 large eggs

PREPARATION

  1. Melt butter either on the stove or in the microwave. Set aside.
  2. In a large bowl, whisk together flour, sugar, baking powder, salt, and baking soda. In a separate bowl, whisk together yogurt, milk, melted butter, and eggs. Fold wet ingredients into dry ingredients.
  3. Preheat a waffle iron and, using a pastry brush or paper towel, lightly coat with butter. Cook waffles (using about ½ cup batter per waffle) until golden and crisp. Butter the iron in between batches as needed. Serve waffles immediately as they are ready, or keep them warm in a 200 degree oven until ready to serve.

Tip

  • If you don’t have yogurt ( sour cream or buttermilk will all work), substitute another 1 cup of milk mixed with 1 tablespoon lemon juice or vinegar.

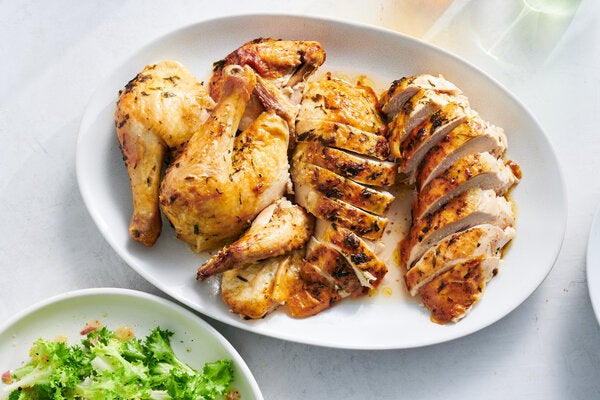
Roast Tarragon-Cognac Chicken

Recipe from Christiane Baumgartner
Adapted by Melissa Clark

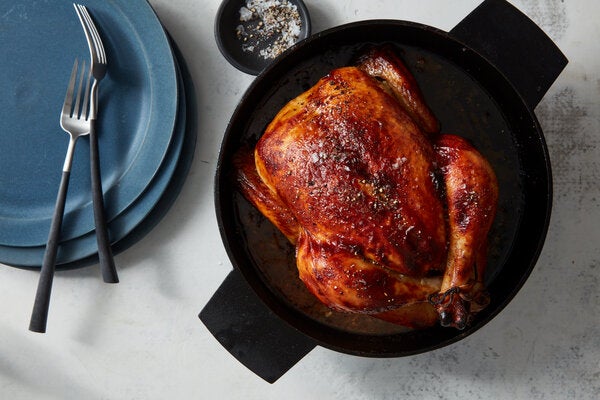
The sophisticated, French flavors of brandy, butter and tarragon season this golden-skinned roast chicken, adding panache to what is otherwise an easy and straightforward recipe, adapted from Christiane Baumgartner via her daughter, Florence Chapgier, a reader. Serve it with mashed potatoes or polenta, a soft bed to absorb all the heady, buttery juices. And if you’re not a tarragon fan, fresh thyme makes an excellent, milder substitute. —Melissa Clark

*****IMPORTANT NOTE: READ STEP FIVE BEFORE YOU MAKE THIS EXCELLENT RECIPE. Also, the oven will get a little messy. The pan juices do splatter.

INGREDIENTS

Yield: 4 servings

  • 1 (4-pound) whole chicken
  • 2 teaspoons coarse gray sea salt or 2½ teaspoons kosher salt (such as Diamond Crystal)
  • 6 tablespoons unsalted butter, softened
  • 1 bunch fresh tarragon, leaves and tender stems coarsely chopped (about ¾ cup)
  • 2 tablespoons Cognac
  • 1 teaspoon freshly ground black pepper
  • PREPARATION
  • Step 1: Pat the chicken dry and salt the bird inside and out. Transfer to a plate or baking dish, preferably on a rack, and refrigerate uncovered for at least 1 hour or overnight.
  • Step 2: When ready to cook the chicken, heat the oven to 400 degrees.
  • Step 3: In a small bowl, combine butter, tarragon, 1 tablespoon Cognac and the pepper. Rub mixture inside the chicken cavity and over and under the chicken skin.
  • Step 4: Place chicken on a rimmed sheet pan or in a large, ovenproof skillet. Roast, breast side up, until the skin is golden and crisp, and the juices run clear when you insert a fork in the thickest part of the thigh (165 degrees), about 1 hour. (I roasted the chicken about 10 minutes longer.)
  • Step 5: Turn off the oven — don’t skip this step, or the Cognac may overheat and catch fire — and transfer the pan with the chicken to the stovetop. Pour the remaining 1 tablespoon Cognac over the bird and baste with some of the buttery pan juices. Immediately return the chicken to the turned-off oven and let rest there for 10 minutes before carving and serving.

Pan-Seared Gyoza

Recipe from Ivan Orkin and Chris Ying
Adapted by Kiera Wright-Ruiz

“Gyoza are plump, Japanese dumplings typically filled with a mixture of ground pork, cabbage, chives, ginger and garlic. They originated as a spin-off of Chinese jiaozi, but they differ in many ways, particularly in how they are wrapped: Gyoza have very thin wrappers sealed with signature pleats, while Chinese jiaozi have thick wrappers that vary in how they are sealed.” This is a wonderful recipe. If you’ve never made them before, do watch those gyoza folding videos online as the NYT suggests.

INGREDIENTS

Yield: 60 gyoza (4 to 6 servings)

  • ½ cup soy sauce
  • 2 tablespoons plus 2 teaspoons rice vinegar
  • 1 to 2 teaspoons Japanese chile oil (rayu) or Chinese chile oil (optional), or to taste
  • 1 pound green cabbage (about ½ medium head)
  • 4 teaspoons kosher salt
  • ¾ pound ground pork
  • 1 tablespoon plus 1 teaspoon minced ginger
  • 1 tablespoon plus 1 teaspoon minced garlic
  • 1 cup chopped garlic chives (nira) or regular chives
  • 1 tablespoon soy sauce
  • 1 tablespoon toasted sesame oil
  • Cornstarch or potato starch, for sprinkling
  • 60 gyoza wrappers (about 12 ounces)
  • Neutral oil (such as vegetable or canola oil), for frying
  • PREPARATION
  • Step 1: Prepare the gyoza dipping sauce: In a small bowl, whisk together the soy sauce and rice vinegar, plus chile oil, if using. Set aside (makes a generous ½ cup).
  • Step 2: Finely chop the cabbage or process it in a food processor into confetti-size bits, then transfer it to a sieve set over a large bowl. Toss with 2 teaspoons of the salt and let sit for 20 minutes in the sink. Gently press the cabbage to squeeze out as much water as you can.
  • Step 3: Combine the drained cabbage, pork, ginger, garlic, chives, soy sauce, sesame oil and the remaining 2 teaspoons salt in a large bowl and mix thoroughly just until everything is evenly distributed. (Don’t overdo it: Too much handling and the fat in the pork will begin to melt.)
  • Step 4: Here’s where you want to employ some extra hands to help you: Fill a small bowl with water. Sprinkle a rimmed sheet pan or two with cornstarch or potato starch to prevent the finished gyoza from sticking (or just use parchment paper). For each gyoza, place a wrapper in the palm of your hand and spoon about 1½ teaspoons of the filling into the center. Use the back of the spoon to smoosh it lightly (it should fill about half the wrapper). You don’t want the filling to run to the edges, but you also don’t want it sitting in a fat clump in the middle. Dip your finger into the water and run it along the perimeter of one half of the wrapper. Now fold the wet edge of the wrapper over to meet the dry edge. Crimp the edges together at one corner, then proceed around the dumpling, using your finger to push the dough into little pleats on one side and pressing them against the other side to seal it. (If you need more guidance, there are hundreds of gyoza-folding videos online.) Place the gyoza on the sheet pan as you finish them.
  • Step 5: To pan-fry the gyoza, you will need a lidded 10-inch nonstick pan or a well-seasoned carbon steel pan. (You could also use whatever skillet you have, but increase the oil and keep a close eye on the gyoza.) Heat 1 tablespoon neutral oil in the pan over medium heat. When hot, add 10 to 15 gyoza, flat-side down, and cook until browned on the bottoms, 2 to 3 minutes. Add enough water to come just under a quarter of the way up the gyoza (about ½ cup, depending on how many gyoza you have in the pan), cover, and let the water cook away until the pan is dry and the gyoza wrappers have softened completely, 3 to 4 minutes. Remove the lid, increase the heat to medium-high, and let the gyoza crisp up on the bottoms for another minute or two, depending on how crisp you like them. Serve immediately with the dipping sauce and additional chile oil. Wipe the pan clean and cook the remaining gyoza. (Alternately, uncooked gyoza can be frozen on a baking sheet in a single layer until firm and then stored in resealable plastic bags for a couple months. To cook frozen gyoza, add a second batch of water in step 4 after the first batch evaporates.)

Off-Oven Roast Beef

By Sam Sifton

I made this with a 3 pound bottom roast beef and cooked it for 20 minutes at 500.* For my family, it was a little rare, so when I try this again, I’ll roast it for 25 minutes before turning the oven off and letting it sit for 2 hours. The roast was AMAZING! Taste was perfect!

INGREDIENTS

Yield: 4 to 6 main courses, with leftovers for sandwiches

  • 1 beef roast, like top, eye or bottom round, approximately 3 pounds
  • 1 tablespoon kosher salt
  • 1 tablespoon freshly ground black pepper
  • 3 cloves garlic, peeled and minced
  • 1 tablespoon olive oil
  • Red-pepper flakes to taste (optional)
  • PREPARATION
  • Remove roast from refrigerator. Preheat oven to 500 degrees.
  • In a small bowl, mix together salt, pepper, garlic, olive oil and red-pepper flakes to create a kind of paste. Rub this all over the roast. Place beef in a roasting pan or cast-iron skillet, fat-side up, and put in oven. Cook undisturbed for 5 minutes per pound.
  • Turn off oven. Do not open oven door. Leave roast to continue cooking, undisturbed, for two hours.
  • After two hours, remove roast from oven. Slice and serve alongside, ideally, a watercress salad and some skillet-fried potatoes.

Beer Batter Fried Fish

For this recipe, you will need to trust your taste buds.

For the fish:

1 pound of flounder fillets, sole, cod, or any other fish you wish to fry.

Salted water with fresh, squeezed, lemon juice – enough to cover the fish

For the batter:

1 cup all purpose flour

1 beaten egg (optional) Coating is crispier without the egg.

A can of beer

cooking oil (I prefer peanut oil for this.)

Preparation:. Here’s where you taste the water. It should be slightly salty and lemony. Soak the fish fillets in this water for about 20 – 30 minutes.

Pour enough oil into a frying pan so that the fish does not stick to the bottom of the pan. Heat on a medium flame.

For the batter, stir the beaten egg into the flour. Now slowly pour in the beer until you have a pancake-like consistency. It shouldn’t be too thick or thin. Drain the fillets and dip them, one at a time, into the batter and let the excess drip off.

Fry the fish in the hot oil until it is nicely browned. Turn, and brown on second side. Carefully lift out the fillet and place it on a piece of paper towel.

Serve with homemade tartar sauce. I just put equal amounts of mayonnaise and pickle relish in a bowl and mix (or the amounts to your taste).