How To Make A Quick Chicken Brine

Brining your poultry, whether it be chicken, turkey, or other types of poultry has long been one of the top secrets of top chefs and restaurants. Brining your lean meats is an excellent way to keep your poultry from drying out during the cooking process.

What Is the Brine Ratio? 

The basic ratio of salt to water for a brine is 4 tablespoons of kosher salt per 1 quart (4 cups) of water. If you are using fine table salt, reduce the amount to 3 tablespoons. Keep in mind, also, that different kosher salt brands vary in how salty they actually are. When in doubt, cut down on the amount of salt or the amount of time you brine the item.

Instructions for a larger brine:

  1. This quick chicken brine recipe calls for 1 cup of salt per gallon of water. You will most likely need more than 1 gallon of water. You want to cover your chicken pieces completely. If you use 4 gallons of water, you will use 4 cups of salt and so on. 
  2. Wash all of the chicken pieces or meat that you are going to brine.  
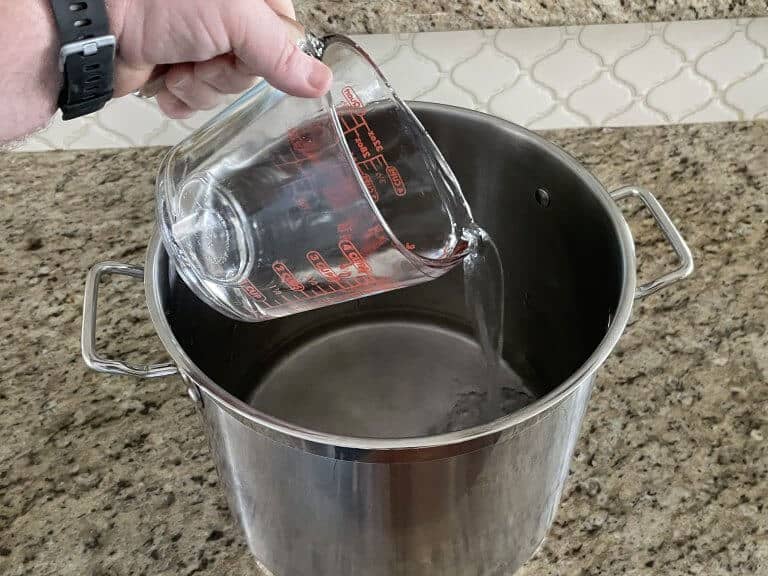
  3. Fill up your pot about halfway with cold water, measuring the water as you put it in so you will know how much you have put in the pot. 
  4. Add 1 cup of salt per gallon of water. 
  5. Stir the salt in the water until it has dissolved. If you want a quick way to do this, you can add a few cups of water to a small pot. Heat it on medium heat until the salt has dissolved, then add it to the rest of the water in the larger container. 
  6. To flavor the chicken, you can add herbs and spices to the brine, such as rosemary, bay leaves, black pepper, or any other spice you desire.
  7. Place the chicken pieces or other meat into the pot or container. 
  8. Soak for up to 12 hours.  (I usually brine a chicken for two hours before roasting.)
  9. After the soak time, remove the chicken pieces or other meat from the container and pat dry with paper towels or allow to drip dry on a cooling rack over a sheet pan. Do not rinse off brine.

Spanakopita

This is a wonderful recipe from a Greek cooking class.

Ingredients:

2 ounces extra virgin olive oil (4 Tablespoons)

1 pound fresh spinach, washed , drained, and chopped

2 bunches scallions, thinly sliced

1/2 bunch dill, minced

8 ounces ricotta cheese

3 eggs

1 pound feta cheese broken into large pieces

salt and freshly ground black pepper

1 package of phyllo dough

1/2 pound butter, clarified

pastry brush

How to make clarified butter

  1. Melt butter in a 1 quart saucepan over low heat, without stirring, 10-15 minutes, or until melted, and solids separate from fat.
  2. Remove from heat; let stand 5 minutes. Skim off foam. Slowly pour off clear yellow liquid, leaving behind the residue of milk solids that has settled to bottom of pan. Cover; store refrigerated. 

Directions:

Preheat oven to 350* F

In a medium saucepan, heat the olive oil on medium high heat. Add the spinach and scallions and sauté until wilted. Add the dill and continue to sauté briefly.Cool and drain off excess liquid.

Combine the ricotta, eggs and broken feta and mix together.

Add the spinach mixture to the cheese mixture. Season with salt and pepper.

Open package of phyllo dough and cut entire package in half lengthwise to make two long rectangles. Place one on top of the other. Keep covered with a damp dish towel while making each triangle.

Take out one rectangular piece and brush lightly with melted clarified butter and place second sheet on top, brushing again with clarified butter.

Fold the rectangle in half lengthwise to make one long narrow rectangle. Brush lightly with melted butter. Place 2 teaspoons of the filling in lower left hand corner. Fold the lower right hand corner to the opposite side of the rectangle, covering the filling, and making a triangle. Continue folding the rest of the triangle in this manner, much like folding a flag. Repeat with the remaining phyllo sheets and the filling.

Arrange on a parchment lined pan, brush with melted butter, and bake in the oven for 20-25 minutes until golden.

Note: If you need a video, search “how to fold phyllo dough (spanakopita triangles)” on youtube.com

Japanese Potato Salad 

By J. Kenji López-Alt

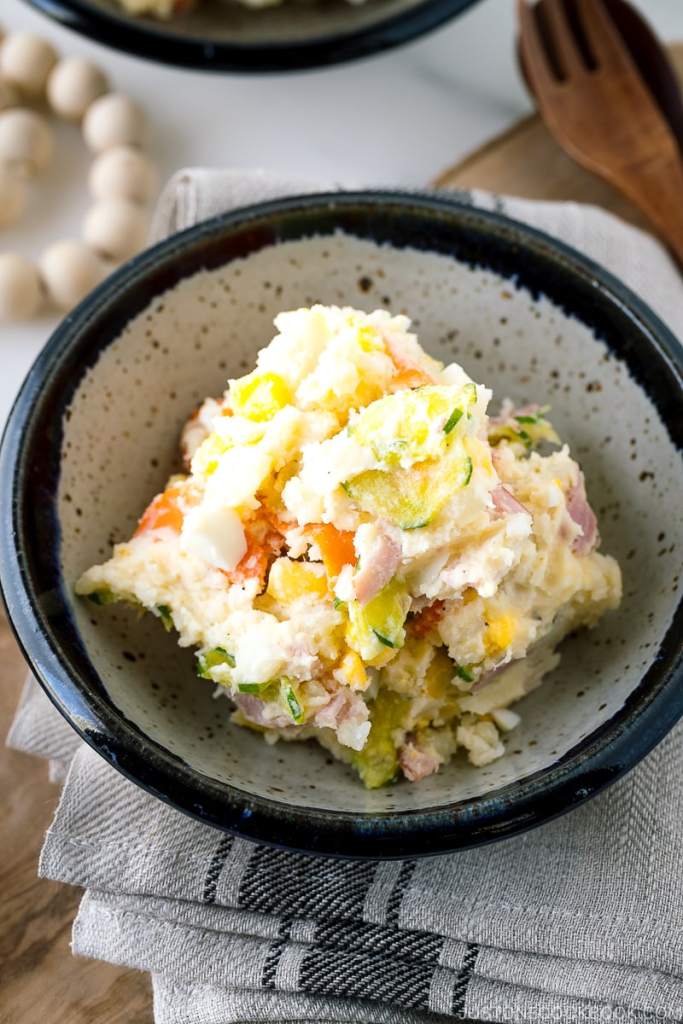
A classic side dish for homemade lunch boxes or bento picnics, a Japanese potato salad is made with boiled russet potatoes, vegetables, boiled eggs and, often, ham, all seasoned with rice vinegar and tangy Japanese Kewpie mayonnaise. The potatoes in Japanese potato salad are typically roughly mashed, but you can dice them if you prefer a heartier texture. Salting the cucumber in advance helps it retain some crunch when you mix it into the salad, while adding vinegar to the potatoes while they’re still hot helps them absorb more flavor.

Note: My family makes this dish with Yukon gold potatoes, carrots, a salted, drained, and squeezed out cucumber, a thinly sliced raw apple, some chopped white onion, and sometimes, a thinly sliced Japanese fish cake (a processed seafood product). The Kewpie mayonnaise definitely adds an authentic flavor.

INGREDIENTS

Yield: 4 to 6 servings

  • 1 pound russet potatoes (about 2 whole large potatoes), peeled and cut into large chunks
  • Salt
  • 2 eggs
  • 1 tablespoon rice vinegar, plus more to taste
  • 2 teaspoons sugar
  • 1 small Japanese or Persian cucumber, or ½ an English cucumber (about 4 ounces), quartered lengthwise, seeds removed and discarded, and thinly sliced
  • 1 small carrot (2 to 3 ounces), quartered lengthwise and thinly sliced (The carrot, just thinly sliced, can be cooked with the potatoes.)
  • ½ cup thawed frozen corn kernels or briefly boiled fresh corn kernels (optional)
  • ¼ cup chopped radish (about 2 radishes; optional)
  • 2 scallions, thinly sliced
  • 5 tablespoons Kewpie mayonnaise (see Tip), plus more to taste
  • 1 teaspoon grated lemon zest
  • 1 teaspoon fresh lemon juice, plus more to taste
  • Freshly ground black pepper
  • Preparation
  • Step 1: In a medium saucepan, cover the potatoes with cold water by at least 1 inch. Add a few big pinches of salt. Bring to a boil over high heat. Gently lower the eggs into the pot. Cover, reduce to a bare simmer, and cook until the potatoes are tender and show no resistance when pierced with a knife or cake tester, 10 to 12 minutes. Drain the potatoes in a colander and spread in a single layer on a large rimmed baking sheet. Immediately sprinkle with vinegar and sugar. Set aside until completely cool, at least 15 minutes. Transfer the eggs to a bowl of ice water and peel when completely cool.
  • Step 2: Meanwhile, toss the cucumber with a big pinch of salt in the bottom of a large bowl and set aside until the potatoes are cool.
  • Step 3: When the potatoes are cool, add them to the bowl with the cucumber and lightly mash with the back of a fork until some bite-size chunks still remain.
  • Step 4: Add carrot, corn, radish, scallion, mayonnaise, lemon zest and juice. Squeeze the hard-boiled eggs through your clean fingers to break them up, or chop them with a knife and add them to the salad. Stir together and season with pepper, more salt, sugar, vinegar, lemon juice or mayonnaise, or a combination, to taste.
  • TIP
  • Kewpie is a Japanese brand of mayonnaise with a thicker texture, and tangier, though any mayonnaise you prefer will work in this recipe.

Garlic Roasted Potatoes

Crispy Garlic Roasted Potatoes are a super simple side dish perfect with anything! Buttery, garlicky, and fluffy inside with crisp, golden edges! You can prepare AND cook your potatoes in ONE PAN!

Note: I am including a similar recipe, however, this one uses more olive oil and a whole head of unpeeled garlic separated into cloves. See below following this recipe.

Ingredients

  • 2 pounds (1 kg) potatoes, cut into cubes (preferably Yukon Gold)
  • 4 tablespoons good quality olive oil
  • 1 teaspoon sea salt
  • 3/4 teaspoon freshly ground black pepper
  • 2 tablespoons minced garlic, (or 8 cloves garlic, minced)
  • 2 tablespoons fresh chopped parsley

Instructions

HOW TO ROAST POTATOES

  • Preheat the oven to 400°F (200°C). Lightly oil a baking sheet or tray.
  • Arrange potatoes on sheet in a single layer. Drizzle with the oil and season with salt, pepper and garlic. Toss so potatoes are evenly seasoned. 
  • Roast in the oven for 45-55 minutes while flipping occasionally, until crisp and golden.
  • Remove the potatoes from the oven and season with a little extra salt and pepper to taste. Sprinkle over with parsley and serve immediately!

Garlic Potatoes (second recipe)

6 potatoes cut into pieces (peeled), or 2 pounds of unpeeled baby Yukon Gold potatoes (pricked with a fork )

1/3 cup of olive oil

1 head of garlic, unpeeled, separated into cloves

salt and pepper

Bake at 450* for 45 minutes to 1 hour. Flip halfway. Serve with the roasted garlic cloves (may be squeezed onto potatoes, if desired). Season with a little extra salt and pepper to taste.

Crispy Baked Chicken

By Ali Slagle

For pull-apart tender chicken with crisp, deeply spiced skin, rub it with a spicy-sweet mix and roast it low and slow while you’re doing something else. Because this chicken is cooked at a moderately low temperature, the spices will bloom but not burn, and the chicken fat will render slowly and completely (which means you don’t need any oil). The smoky rub in this recipe will turn the chicken skin into what tastes like a barbecue potato chip.

INGREDIENTS

Yield:4 servings

  • 4 teaspoons dark brown sugar
  • 2 teaspoons smoked paprika
  • 1½ teaspoons kosher salt (Diamond Crystal)
  • ½ teaspoon black pepper
  • A heaping ¼ teaspoon ground cayenne
  • 4 chicken leg quarters (2½ to 3 pounds), patted dry
PREPARATION
  1. Heat the oven to 325 degrees. In a small bowl, stir together the brown sugar, paprika, salt, black pepper and cayenne with a fork or your fingers. Rub the spice mix all over the chicken. (You can do this step 1 to 12 hours ahead. Refrigerate uncovered, then bring to room temperature before cooking.)
  2. Place the chicken on a parchment-lined baking sheet, skin side up. Bake, without flipping, until the chicken is cooked through and the skin is crisp, 1 hour to 1 hour 15 minutes. Eat the chicken with pan drippings spooned over top.

Note: I used chicken thighs (with skin and bone), regular paprika, and some hot pepper flakes. So good!!!!

Classic Shrimp Scampi

By Melissa Clark

This classic recipe makes a simple garlic, white wine and butter sauce that goes well with a pile of pasta or with a hunk of crusty bread. However you make the dish, once the shrimp are added to the pan, the trick is to cook them just long enough that they turn pink all over, but not until their bodies curl into rounds with the texture of tires.

Note: My family prefers longer cooked shrimp. Still delicious!

INGREDIENTS

Yield:4 servings

  • 2 tablespoons butter. (I used more butter, to taste, than recommended. Felt the sauce was too acidic.)
  • 2 tablespoons extra-virgin olive oil
  • 4 garlic cloves, minced
  • ½ cup dry white wine or broth
  • ¾ teaspoon kosher salt, or to taste
  • ⅛ teaspoon crushed red pepper flakes, or to taste
  • Freshly ground black pepper
  • 1¾ pounds large or extra-large shrimp, shelled
  • ⅓ cup chopped parsley
  • Freshly squeezed juice of half a lemon
  • Cooked pasta or crusty bread

PREPARATION

Step 1: In a large skillet, melt butter with olive oil. Add garlic and sauté until fragrant, about 1 minute. Add wine or broth, salt, red pepper flakes and plenty of black pepper and bring to a simmer. Let wine reduce by half, about 2 minutes.

Step 2: Add shrimp and sauté until they just turn pink, 2 to 4 minutes depending upon their size. Stir in the parsley and lemon juice and serve over pasta or accompanied by crusty bread.

Hush Puppies

By Millie Peartree

Served with salted butter or on their own, hush puppies are the perfect starter or side for any meal, but especially seafood or barbecue.

Yield: 20 hush puppies

INGREDIENTS

  • 2 tablespoons unsalted butter, melted and cooled
  • 1 large egg, at room temperature
  • ¼ cup grated white or yellow onion (from about ½ large onion)
  • 2 tablespoons chopped chives (optional)
  • 1 tablespoon granulated sugar
  • 1  tablespoon brown sugar
  • 1½ teaspoons baking powder
  • ½ teaspoon kosher salt, plus more for finishing
  • 1½ cups fine yellow cornmeal
  • ½ cup all-purpose flour
  • 1 cup buttermilk
  • 1 quart vegetable oil, for frying
  • Salted butter, for serving (optional)

PREPARATION

Step 1

Set a rack over a baking sheet. (If you do not have a rack, a paper towel-lined baking tray will work as well.)

Step 2

In a medium bowl, whisk together melted butter and egg until smooth. Add onion, chives (if using), both sugars, baking powder and salt, and mix until no lumps are present.

Step 3

Mix in cornmeal and flour. While whisking, stream in buttermilk and incorporate until mixture is smooth but not runny. It should be thick enough to easily scoop and drop into hot oil.

Step 4

In a medium skillet with high sides or a deep cast-iron skillet, heat 2 inches of oil to 350 degrees over medium-high heat. Working in batches, scoop 1-tablespoon balls of the batter and carefully drop them into the oil. Fry until one side is golden brown, about 1 minute, then, using a spatula or spoon, flip and fry for another 1 minute until golden brown on all sides.

Step 5

Using a slotted spoon, remove hush puppies from hot oil and place on the prepared rack to drain. Sprinkle with a little more salt. Enjoy hot, with salted butter, if you like.

Crab Cakes (with minimal filler)

I found this recipe on Instagram and was pleased with the results. It has five ingredients plus salt and pepper. If you like Old Bay Seasoning, you can add some. I opted not too. From Sally’s Baking Recipes, “For the absolute best crab cake, I recommend using lump crab meat or a mix of lump crab meat and backfin meat. Lump crab meat guarantees those big, mouthwatering bites of crab.” Her crab cakes are baked. I pan fried these in a small amount of oil.

Ingredients:

1 pound of fresh, lump crab meat

1/3 cup mayonnaise

1/3 cup Panko bread crumbs

1 egg, beaten

1 Tablespoon chopped fresh dill or parsley

salt, pepper to taste

1 teaspoon lemon juice, plus more for serving (optional)

Procedure:

Whisk the egg, mayonnaise, parsley or dill, (lemon juice,) salt and pepper together in a large bowl. Place the crab meat on top, followed by the Panko. With a rubber spatula or large spoon, very gently and carefully fold together. You don’t want to break up the crab meat.

Cover tightly and refrigerate for at least 30 minutes and up to 1 day.

Using a 1/2 cup measuring cup, portion the crab cake mixture into 6 mounds. (Don’t flatten!) Use your hands or a spoon to compact each individual mound so there aren’t any lumps sticking out or falling apart.

Pan fry until brown on one side, flip gently, then pan fry on second side until browned.

Drizzle each with fresh lemon juice and serve warm.

Buttermilk-Brined Roast Chicken

By Samin Nosrat

“This recipe, adapted from Samin Nosrat’s “Salt Fat Acid Heat,” is inspired by the Southern grandma method of marinating chicken overnight in buttermilk before frying it. You’re roasting here, but the buttermilk and salt still work like a brine, tenderizing the meat on multiple levels to yield an unbelievably juicy chicken. As an added bonus, the sugars in the buttermilk will caramelize, contributing to an exquisitely browned skin. Be sure to leave 24 hours for marinating the chicken.”

Note: This recipe calls for a whole chicken, however I used parts. They were incredibly delicious, and I rotated the pan only once, from back to front. They were done in about an hour, turning the oven down to 400* after 20 minutes at 425.*

INGREDIENTS

Yield: 4 servings

  • 1 chicken, 3½ to 4 pounds
  • Kosher salt or fine sea salt
  • 2 cups buttermilk
  • PREPARATION
  • Step 1: The day before you want to cook the chicken, remove the wingtips by cutting through the first wing joint with poultry shears or a sharp knife. Reserve for stock. Season chicken generously with salt and let it sit for 30 minutes.
  • Step 2: Stir 2 tablespoons kosher salt or 4 teaspoons fine sea salt into the buttermilk to dissolve. Place the chicken in a gallon-size resealable plastic bag and pour in the buttermilk. (If the chicken won’t fit in a gallon-size bag, double up 2 plastic produce bags to prevent leaks and tie the bag with twine.)
  • Step 3: Seal the bag, squish the buttermilk all around the chicken, place on a rimmed plate, and refrigerate for 12 to 24 hours. If you’re so inclined, you can turn the bag periodically so every part of the chicken gets marinated, but that’s not essential.
  • Step 4: Pull the chicken from the fridge an hour before you plan to cook it. Heat the oven to 425 degrees with a rack set in the center position.
  • Step 5: Remove the chicken from the plastic bag and scrape off as much buttermilk as you can without being obsessive. Tightly tie together the legs with a piece of butcher’s twine. Place the chicken in a 10-inch cast-iron skillet or a shallow roasting pan.
  • Step 6: Slide the pan all the way to the back of the oven on the center rack. Rotate the pan so that the legs are pointing toward the rear left corner and the breast is pointing toward the center of the oven. (The back corners tend to be the hottest spots in the oven, so this orientation protects the breast from overcooking before the legs are done.) Pretty quickly you should hear the chicken sizzling.
  • Step 7: After about 20 minutes, when the chicken starts to brown, reduce the heat to 400 degrees and continue roasting for 10 minutes.
  • Step 8: Move the pan so the legs are facing the rear right corner of the oven. Continue cooking for another 30 minutes or so, until the chicken is brown all over and the juices run clear when you insert a knife down to the bone between the leg and the thigh. If the skin is getting too brown before it is cooked through, use a foil tent. Remove it to a platter and let it rest for 10 minutes before carving and serving.

Key Lime Poundcake

Recipe from Susan Levin Turner

Adapted by Kim Severson

Key Lime Poundcake
Lisa Nicklin for The New York Times

The recipe has been adapted here for a loaf pan, which is a little easier to find and work with. Ms. Turner likes to coat the inside of the greased cake pan with sugar, which helps the cake slide from the pan and offers a little more crispness to the crust. This recipe uses flour instead for tenderness, but the sugar method offers a homey Southern touch. Or use a combination of both. —Kim Severson

Note: From this blog, you must have noticed that I love baking pound cakes. This recipe is exceptional – really delicious! I was not able to find key lime juice but found key limes at Whole Foods. They took awhile to zest and juice, but the effort was so worth it! ( If you don’t get enough zest from the key limes, use the zest from regular limes.) Hint: The glaze makes enough for two cakes. Halve the recipe.

Ingredients for the cake:

  • 1 cup/226 grams unsalted butter at room temperature (2 sticks), cut into pieces, plus more for greasing the pan
  • 2 cups/240 grams all-purpose flour, more for flouring the pan
  • 1½ teaspoons baking powder
  • 4 ounces/113 grams cream cheese at room temperature, cut into pieces
  • 1½ cups/297 grams granulated white sugar
  • 4 eggs at room temperature, lightly beaten
  • 2 tablespoons lime zest
  • 1 tablespoon Key lime juice (I added a little more.)
  • For the glaze:
  • 4 ounces/113 grams cream cheese at room temperature
  • ¼ cup/57 grams unsalted butter at room temperature
  • 2 cups/227 grams confectioners’ sugar
  • ¼ cup/60 milliliters Key lime juice
  • 2 tablespoons lime zest (optional)
  • PREPARATION
  • Step 1: Make the cake: Heat oven to 325 degrees. Generously butter and flour a 9-by-5-inch loaf pan. Sift the flour and baking powder and set aside.
  • Step 2: Mix butter and cream cheese in bowl of a stand mixer, or with a hand mixer on medium speed, until blended; gradually add sugar and beat on medium speed for 5 minutes until light in color and fluffy. Add the beaten eggs about a quarter at a time, fully incorporating before adding the next.
  • Step 3: Add lime zest and mix to incorporate. Add dry ingredients alternately with lime juice, beginning and ending with flour mixture and adding juice in two additions. Mix just enough to incorporate. Pour batter into pan until it is just ¾-inch from the top. (You may have a little batter left over; do not use it or you risk overflow. Make a cupcake!)) Firmly tap the pan on the counter a few times to reduce air pockets.
  • Step 4: Bake for about 1 hour, or until just set in the middle. Check cake after 30 minutes; if top is browning too quickly, tent with foil. If the cake is not set in the middle after an hour, continue baking, checking middle at 5-minute intervals, until set.
  • Step 5: Cool in the pan for 20 minutes; loosen edges and turn out cake onto plate with raised edges to contain the glaze.
  • Step 6: Meanwhile, make the glaze: In a glass bowl, beat the cream cheese and butter until well blended and a little fluffy, about 2 minutes. With the mixer on slow speed, gradually add confectioners’ sugar until fully incorporated, then beat for 20 to 30 seconds.
  • Step 7: Mix in the lime juice, then heat the mixture in a microwave oven for less than a minute, until it is very warm and loose. Using a wooden skewer, poke several holes in the cake. Pour half the glaze over cake, let sit for 10 minutes, pour remaining glaze over cake and sprinkle with lime zest (optional).