Please check out the Tate’s Chocolate Chip Cookie recipe for another version (and I think a better one). Also, I added my take on how to cook a brisket on the Beef Stew recipe. I will aways update recipes if I come across better ones.
Author Archives: robertaklapper
Two restaurants in Brooklyn: Ursula and Ras Plant Based+ One More, Claudia’s!
All the restaurants were wonderful.
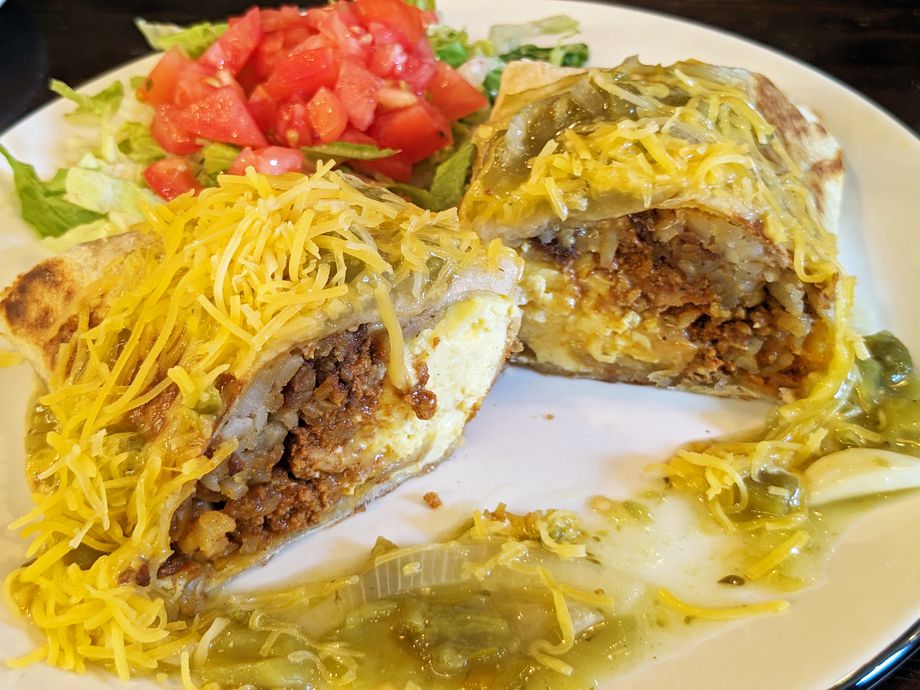
Ursula, a James Beard finalist in 2020, serves New Mexican inspired cuisine. We went for brunch and enjoyed their breakfast burritos with housemade chorizo (or bacon), scrambled eggs, hash browns and cheddar stuffed inside a flour tortilla. Wow! To agree with Eater, NY, (they) “delivered a payload of multiflavored, multitextured pleasure.”
Do ask for the green chile sauce “on the side.”
Ras Plant Based, according to the New Yorker Magazine, is an “Ethiopian tradition for the vegan-curious… (an) homage to ancestral Ethiopian recipes reimagined through a contemporary lens.”
There are two Ras Plant Based restaurants – one on Pier 57 in NYC and the other in Crown Heights. Dishes run from $5 to $19.
The menu is quite extensive. Some of the items are: Flaky sambusas (the Ethiopian equivalent to what’s called a samosa in South Asia and elsewhere), which are stuffed with either lentils or chopped cabbage, onion, and bell pepper.
Injera, which comes with the vegan sampler platter, is a porous, slightly sticky national flatbread of Ethiopia, made from a deliciously sour fermented teff-flour dough and is torn into pieces and combined with tomato, onion, and jalapeño, all doused in a puckery lime vinaigrette.

I had one of their “bowls.” All bowls have a brown turmeric rice base, a drizzle of homemade hot sauce, and injera crumble and cilantro topping.
BOLÉ BOWL
Ras kitfo – soy protein crumble, onion, jalapeño, spice infused oil, Alicha shiro – slow simmered chick pea; holy basil, Gomen – steamed collards, Yatakilt – cabbage, carrot, bell pepper, and Avocado salad – served with tomato, onion, jalapeño.
New Post: Claudia’s of Brooklyn; Guatemalan cuisine
I had their Traditional Plato Breakfast and loved it – soft scrambled eggs with bits of tomato and onion, black beans sprinkled with queso, sweet plantains, and a side of tortilla and crema. Their menu is quite extensive and includes sandwiches, vegan and children’s options.
French Yogurt Cake

Andrew Knowlton
This cake is made by hand; mixer not necessary.
Makes 8 servings
nonstick vegetable oil spray
1 1/2 cups all-purpose flour
2 teaspoons baking powder
3/4 teaspoon kosher salt
1 cup sugar
1 tablespoon finely grated lemon zest
3/4 cup whole-milk Greek yogurt
1/2 cup vegetable oil
2 large eggs
1/2 teaspoon vanilla extract
Preheat oven to 350°F. Coat a standard (8 1/2×4 1/4″) loaf pan with nonstick vegetable oil spray. Dust with flour; tap out excess. Whisk 1 1/2 cups all-purpose flour, 2 teaspoons baking powder, and 3/4 teaspoon kosher salt in a medium bowl. Using your fingers, rub 1 cup sugar with 1 tablespoon finely grated lemon zest in a large bowl until sugar is moist. Add 3/4 cup whole-milk Greek yogurt, 1/2 cup vegetable oil, 2 large eggs, and 1/2 teaspoon vanilla extract; whisk to blend. Fold in dry ingredients just to blend. Pour batter into prepared pan; smooth top. Bake until top of cake is golden brown and a tester inserted into center comes out clean, 50-55 minutes. Let cake cool in pan on a wire rack for 15 minutes. Invert onto rack; let cool completely. DO AHEAD: Can be made 3 days ahead. Store airtight at room temperature.
Note: I used melted butter instead of oil and buttered and sugared my loaf pan before adding batter. Cake is as good as it looks!

Hummus: Two Recipes
Hummus is an ideal dip for picnics, parties and everyday snacking. Serve it with pita, chips, crackers or cut vegetables. In this hummus recipe, adapted from “How to Cook Everything,” tahini is essential, as are garlic and lemon. But this dip is also flexible: cumin and pimentón are optional, as are herbs or blends like za’atar. Hummus can be refrigerated in an airtight container for up to one week.
INGREDIENTS
Yield:6 to 8 servings
- 2 cups drained well-cooked or canned chickpeas, cooking liquid reserved if possible
- ½ cup tahini, with some of its oil
- ¼ cup extra virgin olive oil
- 2 cloves peeled garlic, or to taste
- Juice of 1 lemon, plus more as needed
- Salt and freshly ground black pepper
- 1 tablespoon ground cumin or paprika, or to taste, plus a sprinkling for garnish
- Chopped fresh parsley leaves for garnish
PREPARATION
- Put the chickpeas, tahini, cumin or paprika, oil, garlic and lemon juice in a food processor, sprinkle with salt and pepper and begin to process; add chickpea-cooking liquid or water as needed to produce a smooth purée.
- Taste and adjust seasoning, adding more salt, pepper or lemon juice as needed. Serve, drizzled with some olive oil and sprinkled with a bit of cumin or paprika and some parsley.

Yield:About 2 cups
Hummus from ‘Jerusalem’
Recipe from Yotam Ottolenghi and Sami Tamimi
Adapted by Julia Moskin
- 1¼ cups dried chickpeas (250 grams)
- 1 cup plus 2 tablespoons light tahini paste (270 grams)
- 4 tablespoons freshly squeezed lemon juice
- 4 cloves garlic, crushed
- Salt
- 6½t tablespoons ice-cold water (100 milliliters)
- Put chickpeas in a large bowl and cover with cold water at least twice their volume. Leave to soak overnight.
- The next day, drain chickpeas. In a medium saucepan, add 6½ cups water and bring to a boil. Cook at a simmer, skimming off any foam and any skins that float to the surface, from 20 and 40 minutes, depending on the type and freshness. Once done, they should be very tender, breaking easily when pressed between your thumb and finger, almost but not quite mushy. (They may cook longer than expected.)
- Drain chickpeas. You should have roughly 3 cups (600 grams) now. Place chickpeas in a food processor and process until you get a stiff paste. Then, with the machine still running, add tahini paste, lemon juice, garlic and 1½ teaspoons salt. Slowly drizzle in ice water and allow it to mix for about 5 minutes, until you get a very smooth and creamy paste.
- Transfer hummus to a bowl, cover surface with plastic wrap, and let it rest for at least 30 minutes. If not using immediately, refrigerate until needed, up to two days. Remove from fridge at least 30 minutes before serving.
Roasted Tomato and White Bean Stew
By Colu Henry
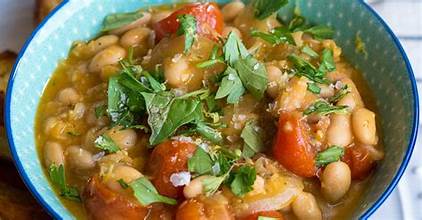
This hearty, flexible stew comes together with pantry ingredients and delivers layers of flavors. Cherry tomatoes, roasted in a generous glug of olive oil to amplify their sweetness, lend a welcome brightness to this otherwise rich dish. Onion, garlic and red-pepper flakes form the backbone of this dish, to which white beans and broth are added, then simmered until thick.
Note: I made this stew using only 1/4 cup of the chicken stock and 1 cup of water. You can avoid the stock altogether if you want to make the meal vegetarian.
INGREDIENTS
Yield:4 to 6 servings
- ½ cup roughly chopped Italian parsley leaves and tender stems
- 2 teaspoons lemon zest (from 1 large lemon) Note: If your tomatoes are not sweet, the zest is unnecessary.
- 2 (10-ounce) containers cherry or grape tomatoes
- ¼ cup olive oil, plus 2 tablespoons and more for drizzling (optional)
- 1 tablespoon fresh thyme leaves
- Kosher salt and black pepper
- 1 medium yellow onion, thinly sliced
- 3 large garlic cloves, thinly sliced
- ½ teaspoon red-pepper flakes
- 2 (15-ounce) cans white beans (such as butter or cannellini), rinsed
- 1½ cups vegetable or chicken broth, or water
- Flaky salt, for serving (optional)
- Toasted bread, for serving
PREPARATION
Heat the oven to 425 degrees. In a small bowl, gently toss together the parsley and lemon zest with your hands until well combined; set aside.
In a large baking dish or on a sheet pan, toss the tomatoes with ¼ cup oil and thyme; season well with salt and pepper. Roast tomatoes until they have collapsed and begin to turn golden around the edges, 20 to 25 minutes.
When the tomatoes are almost done roasting, heat 2 tablespoons oil in a large (12-inch), deep skillet or Dutch oven over medium. Add the onion, garlic and red-pepper flakes and cook until the onion is softened and the garlic is fragrant, 4 to 5 minutes. Stir in the rinsed beans and broth and bring to a simmer. With the back of a spoon or spatula, gently smash about ½ cup of the beans so they slightly thicken the broth. If you want a thicker stew, crush some more of the beans. Season with salt and pepper.
When the tomatoes are finished roasting, add them directly to the stew along with any juices that have been released. Simmer for 5 to 10 minutes more so the flavors become friendly; season to taste with salt.
Ladle into shallow bowls. Top each serving with some of the lemon-parsley mixture and drizzle with more olive oil, and season with flaky salt, if you like. Serve with toasted bread.
The dish is vegan as written, but should you choose to top your bowl with a showering of grated pecorino or Parmesan, it would most likely work well in your favor.
Panna Cotta
By Lidey Heuck
Time15 minutes, plus 4 hours’ cooling
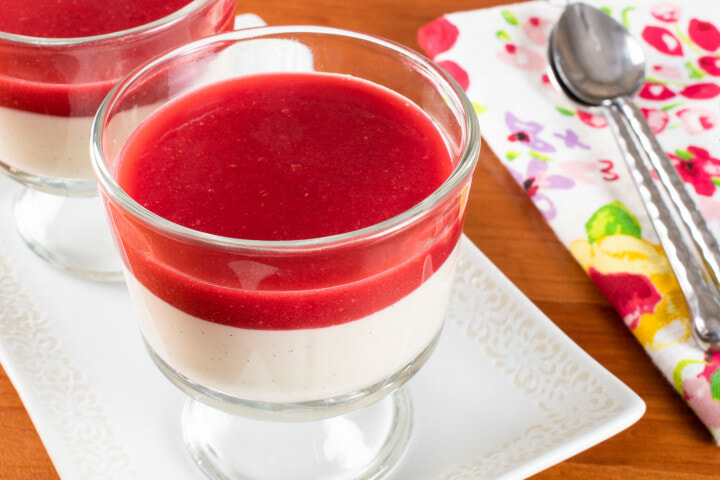
Though panna cotta means “cooked cream” in Italian, this pudding-like dessert actually spends very little time on the stove. Gelatin and sugar are dissolved in warm milk before being mixed with heavy cream and vanilla, then poured into ramekins to chill and set. Surprisingly simple and ideal to make in advance, this recipe makes a traditional vanilla-flavored panna cotta that can be dressed up any number of ways, with fresh berries or a raspberry coulis. Serve directly from the ramekins for a more casual dessert, or unmold the panna cottas for an impressive and elegant end to any meal.
INGREDIENTS
Yield:6 servings
- Neutral oil or nonstick cooking spray, for the ramekins
- 1 cup/240 milliliters whole milk
- 2½ teaspoons powdered unflavored gelatin (1 pouch)
- ½ cup/100 grams granulated sugar
- 1 teaspoon vanilla extract
- ⅛ teaspoon kosher salt (such as Diamond Crystal)
- 2 cups/480 milliliters heavy cream
PREPARATION
- Lightly brush six (6-ounce) ramekins, water glasses or molds with neutral oil, wiping away any excess with a paper towel.
- Pour the milk into a medium saucepan. Sprinkle the gelatin onto the milk in an even layer and set aside for 5 minutes for the gelatin to “bloom.” The surface of the milk will turn dry and wrinkly.
- Turn the heat to low and cook, stirring often, until the gelatin is dissolved, about 2 minutes. Add the sugar, turn off the heat and stir until the sugar is dissolved, returning the pan to low heat to rewarm if needed. Stir in the vanilla and salt.
- Pour the milk mixture through a sieve into a large glass measuring cup or other heat-proof container with a pouring spout. Add the cream and stir to combine. Divide the mixture among the prepared ramekins, cover with plastic wrap, and refrigerate until set, at least 4 hours.
- Serve the panna cottas directly from the ramekins, or unmold if desired. To unmold: Just before serving, add 1 inch of hot tap water to a small bowl. Place one of the ramekins in the bowl, being careful that the water doesn’t overflow into the ramekin, and hold it there for 10 seconds. Remove the ramekin and dry the bottom with a dish towel. Run a sharp knife around the sides of the panna cotta, then place an upside-down dessert plate over the ramekin. Holding the two together, flip the plate so that the ramekin is inverted. Wiggle and tap the sides of the ramekin to release the panna cotta. If it does not release, return the ramekin to the water for another 5 seconds.
- Repeat with the remaining ramekins, refilling the small bowl with more hot water as necessary. Top the panna cottas with fruit or other desired toppings and serve.
Raspberry Coulis: this recipe is from For the Love of Cooking
- 12 oz fresh raspberries (can use frozen berries but must be thawed)
- ¼ cup water
- 7 tbsp sugar (less if the berries are very sweet)
- ⅛ tsp salt
- 2 tsp fresh lemon juice
- Make the raspberry coulis while the panna cotta is setting in the refrigerator by combining the raspberries, water, sugar, and salt together in a saucepan over medium heat. Cook, stirring often, until the sugar is dissolved and the berries are heated through, about 1-2 minutes.
- Pour the mixture into a blender and puree until smooth, about 20 seconds.
- Strain through a fine-mesh strainer into a measuring cup, pressing and stirring the puree with a rubber spatula to get as much seedless puree as possible. Add the lemon juice; mix well.
- Cover with plastic wrap and place in the refrigerator for at least an hour, or until needed.
- Pour some raspberry coulis on top of the panna cotta then serve. Enjoy!
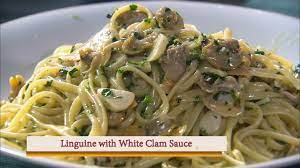
LINGUINE WITH WHITE CLAM SAUCE
Lidia Bastianich
My daughter’s husband served me this recipe, and it was so good, I have to include it in the blog. You can watch Lydia make this on YouTube.
Ingredients
- 6 TABLESPOONS EXTRA-VIRGIN OLIVE OIL
- 6 GARLIC CLOVES, SLICED
- 4 ANCHOVIES, SLICED
- 36 LITTLENECK CLAMS, SCRUBBED
- 1/4 TEASPOON PEPERONCINO FLAKES (red pepper flakes)
- 1/4 TEASPOON DRY OREGANO
- 1 POUND LINGUINE
- 3/4 CUP CHOPPED FRESH ITALIAN PARSLEY
Bring a large pot of water to boil for pasta. In a large straight-sided skillet, heat 4 tablespoons olive oil over medium heat. Add sliced garlic and cook until sizzling, about 1 to 2 minutes. Add anchovies and stir until the anchovies break up and dissolve into the oil, about 2 minutes.
Add the clams to the skillet, along with the peperoncino and oregano. Bring to a simmer, cover, and cook until clams open, about 5 to 7 minutes. As the clams open, remove to a bowl. (Discard any unopened clams.) Meanwhile, add linguine to pasta water.
When all the clams are out, and the linguine is al dente, ladle in about 2 cups pasta water, increase heat to high, and add 1/2 cup of the parsley. Cook until liquid is reduced by half. Meanwhile, shuck the clams.
When the sauce is reduced, add the pasta directly to the sauce. Cook and toss until the pasta is coated with the sauce. Add shucked clams and remaining ¼ cup chopped parsley, Cook a minute more, to blend the flavors, and serve.
Note: In the video, Lidia does not add pasta water to the sauce; she pours some white wine into it. Watch the video to judge the amount. She also pours olive oil onto the finished dish, the other 2 Tablespoons. You do not have to shuck the clams. They can be served whole on top of the linguini.
Discovering Greenpoint, Brooklyn, Updated
I thought I was no stranger to the Greenpoint area of Brooklyn having eaten at Di and Di Vietnamese Restaurant and Frankel’s Delicatessen & Appetizing, but was pleasantly mistaken. After two consecutive days of exploring and dining, I am only beginning to discover this amazing neighborhood.
Greenpoint sits on the East River, on the border of Williamsburg, and like its neighbor, has a park and promenade along the waterfront, although somewhat smaller and less crowded. Transmitter Park offers natural wetland landscaping, a nautical themed children’s play area, a pedestrian bridge and a pier with views of Manhattan.
Our first stop was brunch at Lingo after being intrigued by their menu out front. The restaurant offered “a unique blend of Japanese American cuisine.” The name, Lingo, means apple in Japanese, and is a nod to the owner’s affection for NYC. Brunch was delicious – quiche topped with a smattering of bonito flakes, soft scrambled eggs with a slab of grilled bacon, grilled sour dough bread that was brushed with sake, and pots of mint tea.
After a stroll around the area, and viewing the beautiful old row houses on the surrounding streets, it was time for pizza at Paulie Gee’s. Not bad! It was then that we noticed the long line at Taqueria Ramirez down the block and vowed to return another time, which we did – the next day! It was named one of the best taco counters in NYC and got an excellent review by the New York Times. It didn’t disappoint.
Lastly we discovered The Radio Bakery on India Street and have already been back twice. Their breads are some of the best I have ever eaten, along with heavenly focaccia, “sandwiches that riff on classics from places like New Orleans, Midtown street carts, the Grecian Islands and your corner bodega” (Brooklyn Magazine), and a wide selection of savory and sweet to choose from.
So if you’re looking for adventure, try this wonderful neighborhood. There is so much more to explore.

Update: We tried Taku Sando, a Japanese sandwich shop in Greenpoint that focuses on Japanese milk bread. “Theirs is soft and pillowy, with a crust like a perfectly smushed donut. It’s dense, chewy, a little sweet, and a great textural contrast to all the crunch in the pork and chicken katsu sandwiches. They use panko made from leftover loaves, and the sandwiches are loaded with slivered cabbage, pickles, a sweet sauce, and a mayo and karashi mustard combination. They also make egg salad and korokke (croquette) sandwiches, a few salads and paper-thin ribbon fries.” (The Brooklyn Hit List: The Best New Restaurants In Brooklyn). Fun!!!!

Teriyaki Sauce and Yakitori (Grilled Chicken Skewers)
From Japanese Cooking, A Simple Art, by Shizuo Tsuji
Yakitori by Melissa Clark
Makes 1 1/2 cups:
7 tablespoons sake
7 Tablespoons mirin
7 Tablespoons dark soy sauce
1 Tablespoon sugar
Mix ingredients in a saucepan and bring to a boil over medium heat; boil until sugar is dissolved. Use immediately, or cool, bottle, and store in the refrigerator.
For chicken teriyaki:
6 chicken thighs with skin and bone or a combination of drumsticks and thighs
vegetable oil
1/2 cup teriyaki sauce
Pierce chicken skin with a fork to allow sauce to penetrate freely. Heat a small amount of oil in a medium-sized heavy bottomed skillet. Lay chicken skin side down in the skillet. Pan fry over medium high heat until chicken skin is well browned. Move chicken in the pan to keep from sticking to the skillet. When browned, turn and fry, covered, for about 10 minutes. Remove chicken temporarily from the pan. Over medium heat, into the juices in the pan, pour the teriyaki sauce. Bring liquid to a boil, stirring. After a minute or so, the liquid will thicken slightly and take on a luster. Return chicken to the skillet turning chicken several times so that it is well coated in teriyaki sauce. Remove from heat when sauce is almost completely reduced, a few minutes at most.
Note: The author suggests using boneless thighs and drumsticks.
Sake, or Nihonshu, is a Japanese alcoholic beverage made of short-grain rice. It’s a centuries-old drink and a vital part of Japanese culture that’s drunk and used in Japanese cuisine.
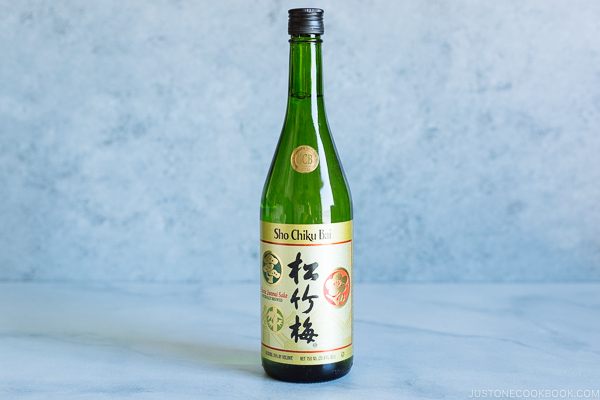
Note: The Yakitori recipe can use the above Teriyaki sauce instead of the sauce suggested. I found Melissa Clark’s recipe not sweet enough, however do add the garlic and ginger. You can increase both of their amounts if desired.
Yakitori (Grilled Chicken Skewers):
Yakitori is Japanese skewered and grilled chicken that can use approximately 30 different chicken parts, from momo, or chicken thigh, to nankotsu, or chicken cartilage. This recipe calls for marinating chicken thighs, gizzards and livers in a savory-sweet sauce of ginger, sake, mirin, soy sauce, garlic and a touch of brown sugar, grilling or broiling, then scattering with chopped scallions. Serve it alongside something fresh and green, like a cucumber salad, and a pile of rice.
INGREDIENTS
Yield: 6 appetizer servings
- 1 pound chicken livers, gizzards or boneless thigh meat
- ½ cup dark soy sauce or tamari
- ¼ cup mirin
- 2 tablespoons sake or dry sherry
- 1 tablespoon brown sugar
- 2 garlic cloves, peeled and smashed
- ½ teaspoon grated fresh ginger
- Scallions, thinly sliced, for garnish
PREPARATION
- Cut chicken into one-inch pieces and place in a shallow dish.
- In a small saucepan, combine soy sauce or tamari, mirin, sake or sherry, brown sugar, garlic and ginger. Bring to a simmer and cook for 7 minutes, until thickened. Reserve 2 tablespoons sauce for serving. Pour remaining sauce over chicken, cover, and chill for at least one hour (and up to 4 hours).
- If using wooden or bamboo skewers, soak them in water for one hour. Preheat grill or broiler. Thread chicken pieces onto skewers (can use rectangular pieces of scallions in between chicken pieces), and grill or broil, turning halfway, for about 3 minutes for livers, 10 minutes for gizzards and 6 minutes for thighs. Serve drizzled with reserved sauce and garnished with scallions. (Adding reserved sauce to chicken may make the dish too salty.)

VEGETABLE PISTOU
By Eric Ripert
Growing up, my family would make this simple dish every year in the middle of August when summer vegetables are at their peak… We would gather at long tables in the garden on those warm evenings in Provence to eat this pistou together… Each time I make it, it takes me right back. I hope you enjoy cooking this recipe as much as I do! (This is the original recipe from my Grandmother Emilienne.)
Note: If you use a little more onion, the whole zucchini, and not peel the tomato, it’s ok! Also, I used only half of the basil.
Ingredients:
1/2 cup dried white navy beans
sea salt, pepper
1/4 of a small onion, 1 medium carrot, 1/2 of a medium zucchini, 12 to 15 green beans. All the vegetables are 1/4 inch diced.
1 medium tomato, peeled, 1/4 inch diced.
3 cups of loosely packed basil leaves, about 1 bunch
1 garlic clove, chopped
1/3 cup olive oil
Directions:
Soak beans overnight. Drain. Cook in 3 cups of water. When almost done, add salt and pepper. Then stir on onion, zucchini, carrot, green beans, and tomato. Cook for 10-12 minutes.
Blanch basil for 30 seconds in hot water and then transfer to a bath of cold water. Gently squeeze out excess water. Transfer to a blender. Add garlic and with blender on low, slowly stream in the olive oil. Puree pesto. Add salt and pepper.
Stir pesto into beans and vegetables. Adjust seasoning.
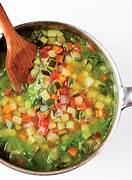
Note: When I added the vegetables to the beans, I needed to add a little more water. (This pistou recipe is a soup.)